
If you have an old, unused tree stump in your yard, don’t rush to remove it—repurposing it as a natural planter is a creative and eco-friendly way to transform what was once an eyesore into a stunning garden feature.
With a little effort, you can hollow out a stump and fill it with vibrant flowers, succulents, herbs, or even small shrubs. These tree stump planters add rustic charm and can become focal points in any landscape.
Whether you’re working with a small, slender stump or a wide, weathered trunk, there are countless design possibilities.
The size and shape of the stump will determine what types of plants will thrive best. In this guide, we’ll cover how to choose plants, prepare the stump, and turn it into a living planter that adds beauty and biodiversity to your yard.
Choosing the Right Plants for Your Tree Stump Planter
Tree stumps vary widely in size, shape, and level of decay, so it’s important to match your plant selection with the size and condition of the natural “container.”
-
Small or narrow stumps: Ideal for low-growing flowers like pansies, violas, alyssum, or even a compact herb like thyme or chives.
-
Medium-sized stumps: Can accommodate trailing plants like petunias, lobelia, or small ferns. These look particularly beautiful cascading down the sides.
-
Large, wide stumps: Offer space for larger root systems and can house bushier plants like hostas, ornamental grasses, dwarf shrubs, or even a young ornamental tree such as a Japanese maple or small conifer.
You can also create a miniature fairy garden inside a stump by combining moss, succulents, tiny figurines, and pebbles for a whimsical woodland touch.
Let Your Creativity Run Wild
Tree stump planters are more than functional—they’re living sculptures.
Depending on your style, you can keep the design natural and rustic, or enhance it with decorative touches:
- Carve patterns or faces into the bark.
- Add solar-powered landscape lights around the stump to highlight your planter at night.
- Surround the base with a ring of river stones, ground cover plants, or mulch for a polished finish.
- Place it strategically as a centerpiece in a flower bed or a feature on a garden path.
The only real limit is your imagination.
Tools and Materials You’ll Need
Before getting started, gather the following tools and supplies:
- Splitting axe or mattock
- Electric drill with wood bits
- Hammer and wood chisel
- Gardening gloves
- Shovel or trowel
- Potting soil or compost
- Watering can or hose
- Plants or seeds of your choice
Step-by-Step Guide: How to Make a Tree Stump Planter
Step 1: Choose and Prepare the Stump
Select a stump that is stable, solid on the outside, and in a location that receives appropriate sunlight for your desired plants. If the top is uneven, use a splitting axe or hand saw to level it out. A flat top ensures better soil retention and plant growth.
Tip: Avoid stumps that are completely rotted through or infested with termites or fungi, as they may crumble quickly and could spread disease to nearby plants.
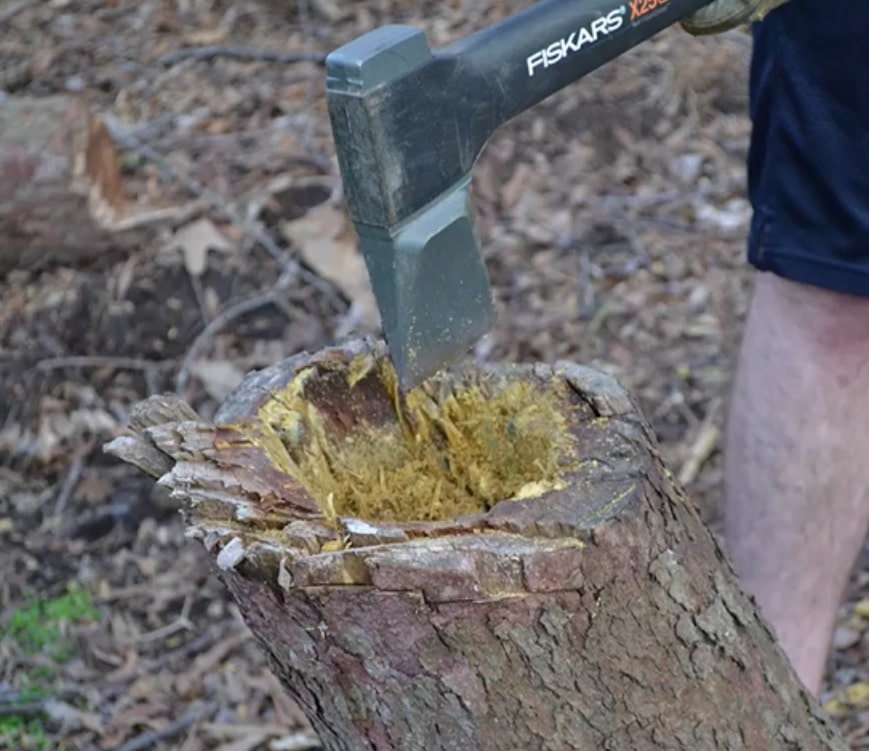
Step 2: Hollow Out the Center
Using a splitting axe or a hammer and chisel, begin removing the center of the stump to create a planting cavity. Focus on the middle and avoid cutting too close to the edge—you want to preserve the integrity of the outer walls.
-
Make initial cuts or slits across the center.
-
Remove sections gradually by striking the chisel into the cuts to loosen chunks.
-
For partially decayed wood, you can use a hand trowel or even your hands to scoop out soft material.
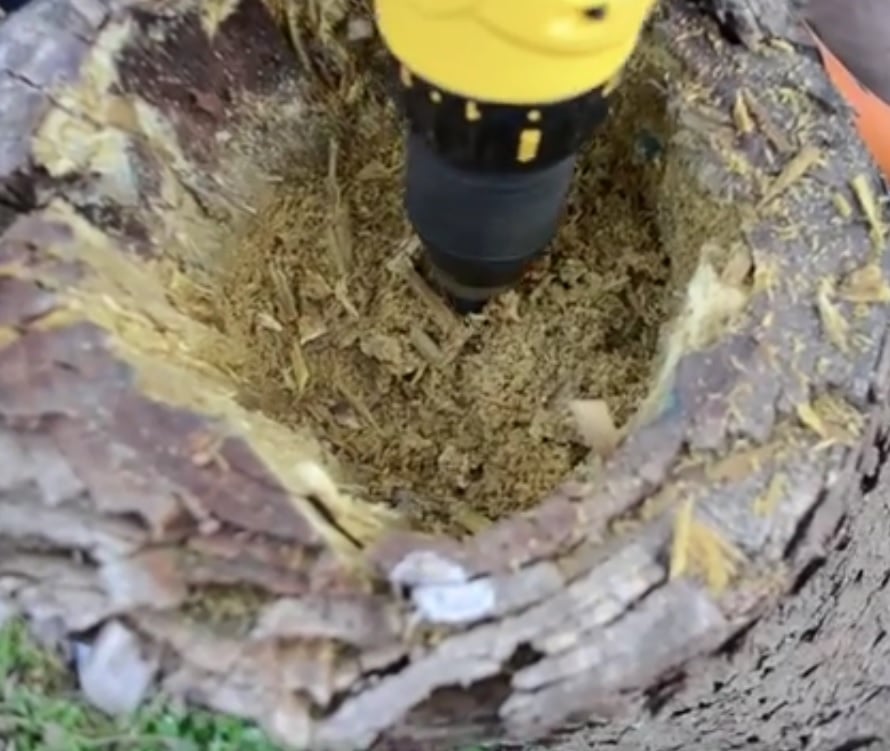
Step 3: Drill Drainage Holes
Plants need well-drained soil to avoid root rot, so adding drainage is essential.
-
Use an electric drill to bore a few vertical drainage holes from the hollowed cavity downward. This allows excess water to escape through the bottom of the stump.
-
If the stump is already decaying at the base, water may drain naturally, but drilling ensures long-term performance.
Step 4: Clean and Prepare for Soil
After hollowing the stump, clean out any remaining wood dust, loose debris, or insects. Use gloved hands or a garden brush.
Optional: Line the inside of the cavity with landscape fabric to slow further decomposition and prevent soil loss, especially in deeply hollowed or cracked stumps.
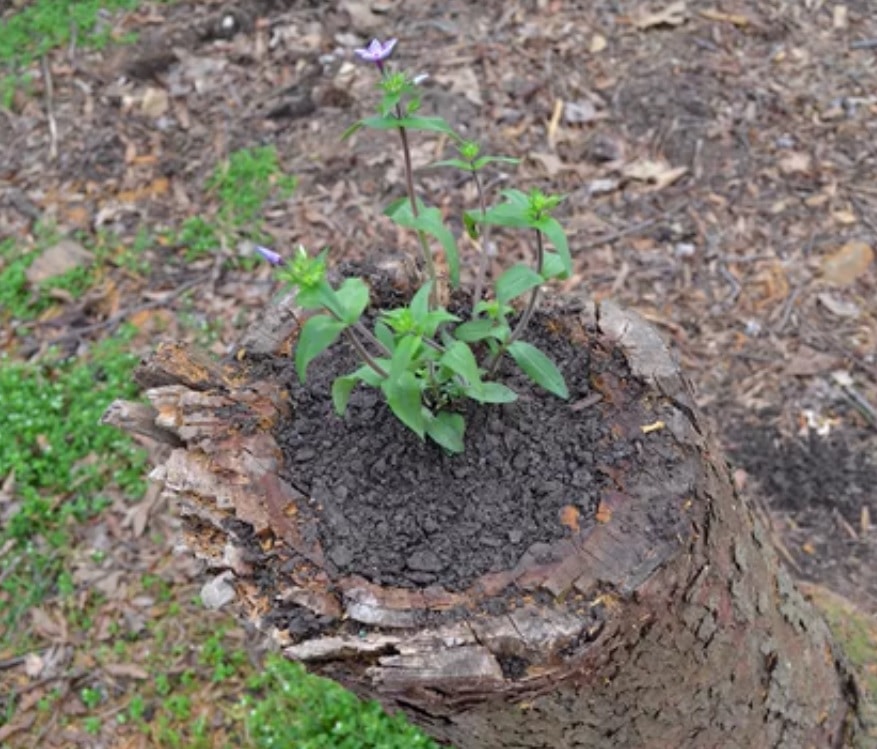
Step 5: Fill with Soil and Plant
Fill the cavity with high-quality potting soil or compost. Make sure it’s well-draining and suited to the type of plants you’ve chosen.
-
Water the soil thoroughly before planting.
-
Add bedding plants, herb starts, or seeds.
-
Pat down the soil gently to stabilize the roots and top off as needed.
Tip: For cascading plants, position them near the edge of the stump so they spill over naturally, softening the rugged appearance of the wood.
Long-Term Maintenance Tips
-
Water regularly, especially during hot or dry periods, as stumps can dry out quickly.
-
Fertilize as needed, depending on plant type—compost tea or organic liquid feeds are excellent choices for stump planters.
-
Monitor for pests or fungal growth, especially if the stump was already decaying.
-
Add mulch around the base to keep weeds at bay and improve moisture retention.
Bonus Ideas for Tree Stump Planters
-
Stack smaller stumps to create a tiered garden effect.
-
Paint the exterior with weatherproof chalk paint for a pop of color.
-
Add a birdbath basin or garden statue on top of larger stumps for a mixed-function feature.
-
Surround with native wildflowers or low ground covers to blend the planter into the landscape.
Turning an old tree stump into a planter is not just a great way to recycle natural materials—it’s also a rewarding DIY project that adds personality and life to your garden.
Whether you’re looking to reuse natural features, introduce a unique planting area, or simply add a creative touch to your landscape, a tree stump planter offers endless possibilities.
With a bit of effort and imagination, you can transform decay into beauty—a living reminder that even the end of one life can become the start of another.


