
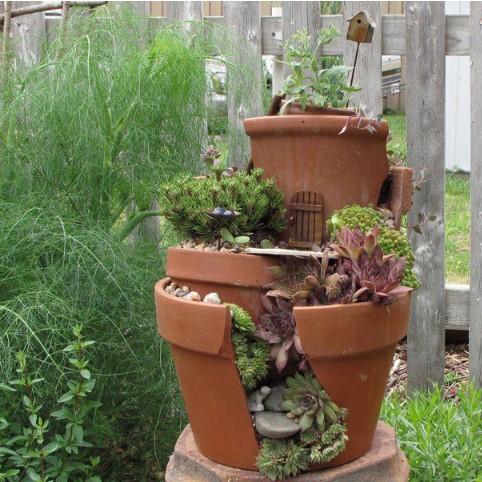
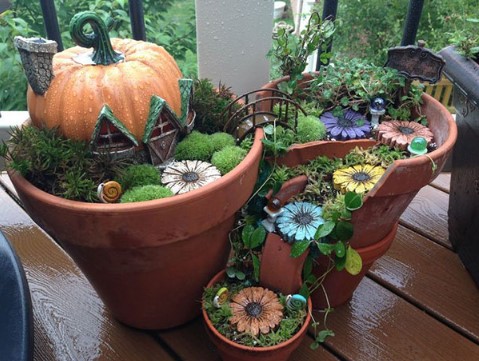
If you’ve ever broken a flower pot, don’t be too quick to toss it out—because what may seem like garden waste can actually become the perfect foundation for a magical DIY fairy garden.
These enchanting little creations have been popping up in gardens, balconies, and patios all over the world, combining upcycling, creativity, and container gardening into one whimsical art form.
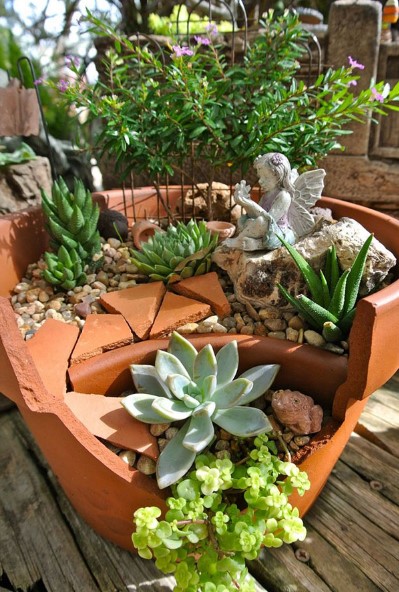
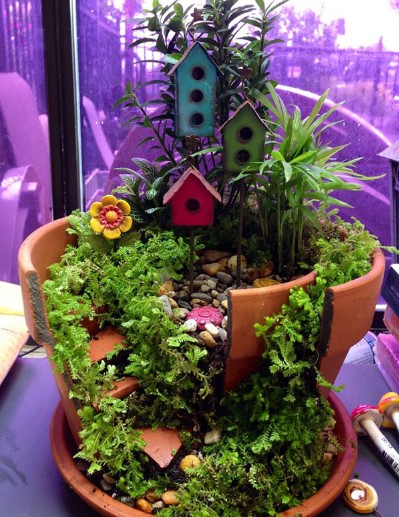
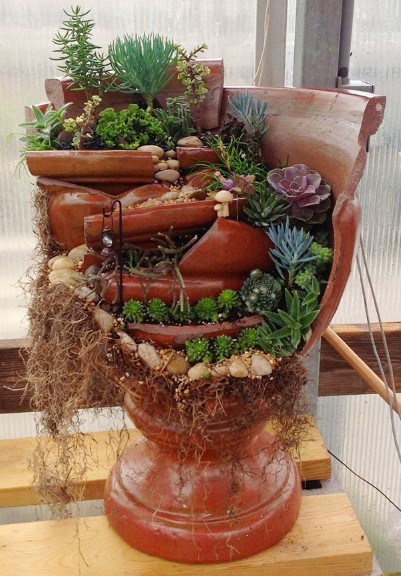
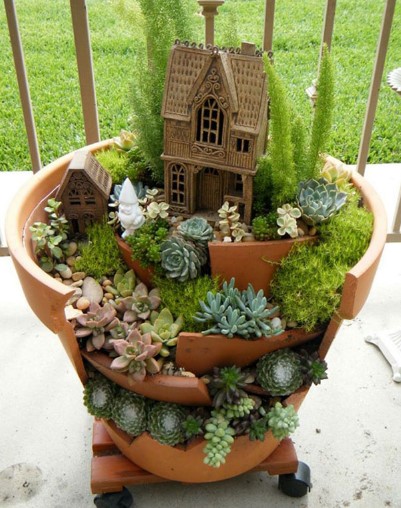
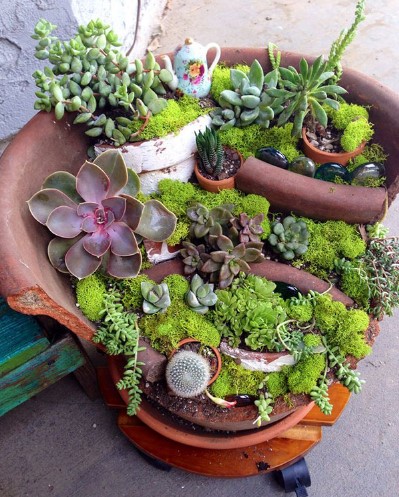
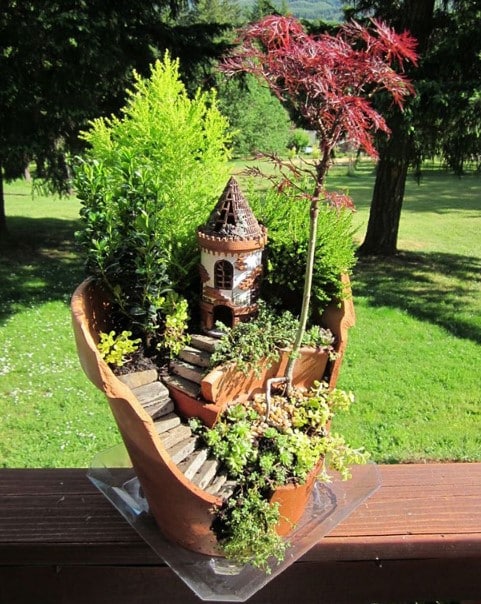
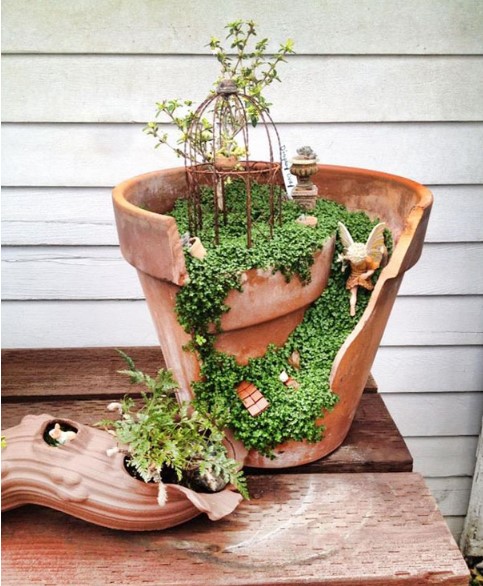
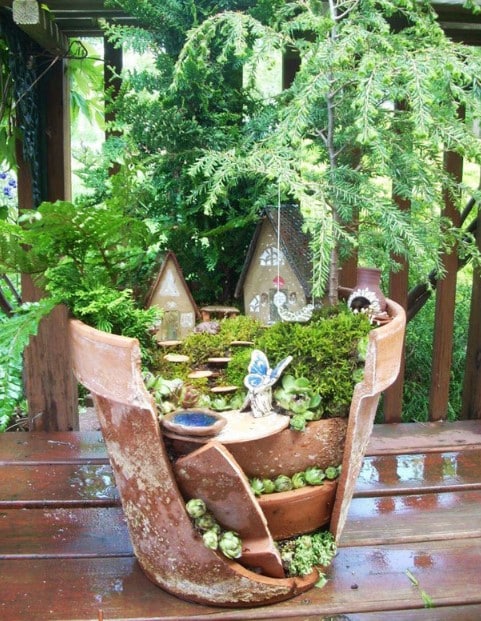
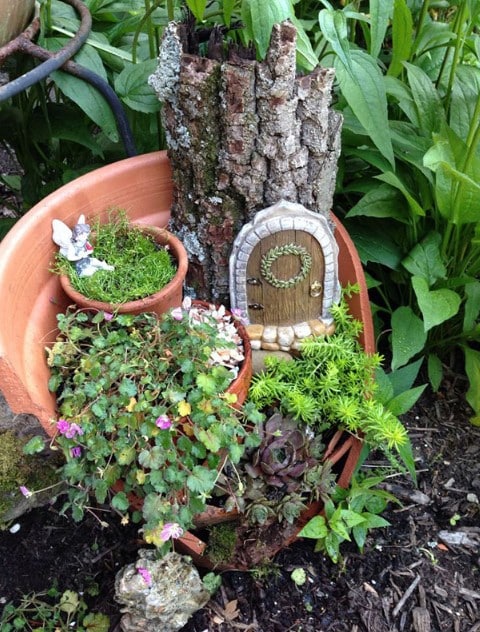
Fairy gardens are miniature landscapes often filled with small plants, figurines, moss, and natural elements, and using a broken terracotta or clay pot as the base brings character and charm to the design.
Whether your pot broke by accident or you’re breaking it intentionally to create your own, this is a fun and beginner-friendly project that adds personality and fantasy to your outdoor space.
In this guide, we’ll show you how to create your own broken pot fairy garden step-by-step, including how to safely break or reshape your pot, design layout ideas, plant suggestions, and decorative tips.
Why Use a Broken Pot for a Fairy Garden?
- Eco-friendly: Reuse and repurpose old or cracked pots instead of throwing them away.
- Unique design: The uneven edges and broken layers create natural-looking “terraces” and levels.
- Small-space friendly: Perfect for patios, balconies, or even indoor displays.
- Creative outlet: Let your imagination run wild with miniature furniture, paths, and accessories.
Materials You’ll Need:
- A broken or breakable terracotta/clay pot (ideally 10–14 inches tall)
- Safety gear: gloves, safety goggles, and a dust mask
- Tools: craft saw or tile file, hammer, chisel, or rotary tool (Dremel)
- Water (for soaking and softening clay)
- Potting soil (well-draining for succulents or moss)
- Small plants (succulents, moss, baby’s tears, miniature ferns)
- Pebbles, decorative gravel, and moss
- Fairy garden accessories: mini houses, fairy figurines, toadstools, fences, furniture, etc.
- Optional: broken tile pieces, marbles, or miniature stairs
Step 1: Prepare or Intentionally Break Your Pot
If you don’t already have a naturally broken pot, you can intentionally break one with care:
Safe Pot-Breaking Method:
-
Soak the pot in water for 1–2 hours. This softens the clay and reduces cracking unpredictability.
-
Wear safety goggles and gloves to protect yourself from sharp shards.
-
Place the pot inside a towel or blanket to prevent fragments from flying.
-
Use a hammer and chisel or rubber mallet to tap gently along the area you want to break.
-
Create one large side opening or multiple small “layers” to simulate stairs or terraces.
-
Smooth sharp edges using sandpaper or a tile file.
Tip: Use a rotary tool like a Dremel for more precise shaping or if you want to carve in steps or design details.
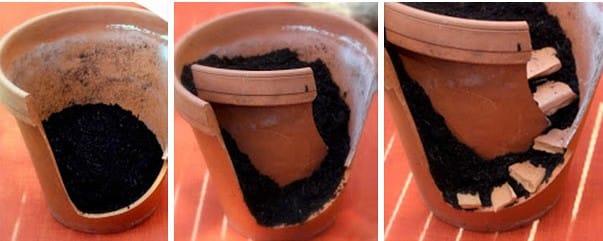
Step 2: Add Drainage and Soil
Once your pot is shaped:
-
If the pot has a drainage hole, cover it with a mesh screen or broken pottery shard to keep soil from washing out.
-
Add a base layer of small pebbles or gravel for improved drainage.
-
Fill the pot with well-draining potting soil up to the base of your first “terrace” or level.
-
Gradually add more soil as you build up the inner layers of the garden.
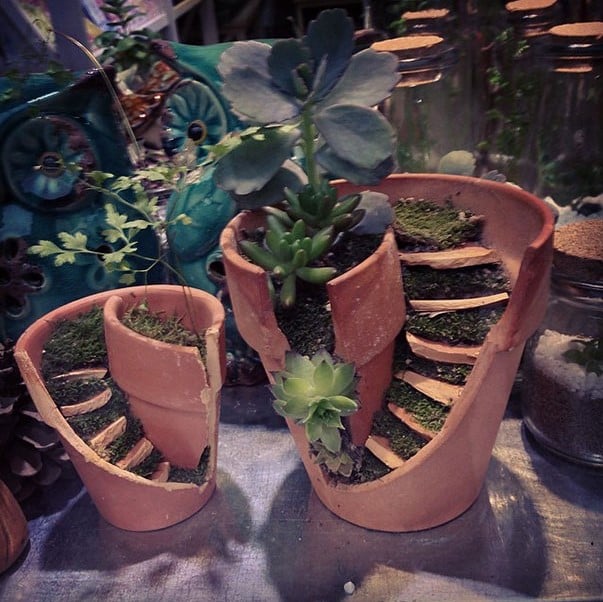
Step 3: Arrange Broken Pieces to Create Terraces
This is where the magic begins.
-
Use broken shards of the original pot to create layers, steps, or retaining walls.
-
Nestle each piece into the soil, securing them at angles to build tiered levels.
-
Each terrace can hold different plants, stones, or decorations.
-
Leave space between layers to mimic little walkways or garden beds.
Step 4: Choose and Plant Miniature Plants
The key to a successful fairy garden is using small, low-maintenance plants that fit the scale.
Great plant options for fairy gardens:
-
Succulents: echeveria, haworthia, jade plant, hens and chicks
-
Creeping thyme or Irish moss (adds ground cover effect)
-
Miniature ferns for a woodland look
-
Baby’s tears or mini trailing plants for cascading effects
-
Sedum varieties for texture and color
Plant each species in different tiers or corners of the garden, keeping taller plants in the back or upper levels and ground covers below.
Step 5: Decorate with Fairy Accessories
Now for the fun part—bringing your tiny world to life.
Fairy garden accessories you can include:
-
Mini fairy houses or tree stumps
-
Stone or bark pathways
-
Tiny benches, bridges, and fences
-
Fairy figurines, gnomes, or woodland animals
-
Mini mushrooms, lanterns, or birdbaths
-
Natural elements like pinecones, seashells, or driftwood
Arrange your decorations in ways that tell a story—maybe a fairy resting on a bench or a woodland path leading to a tiny home.
Step 6: Water and Maintain
-
Water sparingly, especially if you’re using succulents.
-
If indoors, ensure the garden gets bright, indirect light.
-
Mist moss and ferns occasionally to keep them lush.
-
Remove debris or weeds and rotate the garden occasionally for even growth.
-
Refresh soil or add new accessories over time to change the theme or seasons.
Bonus Tips:
-
Use LED fairy lights to illuminate your garden at night.
-
Build seasonal themes: add pumpkins in fall or snowflakes in winter.
-
Display your garden on a tabletop, porch, or windowsill for all to admire.
-
Make it a family project—kids love helping create fairy gardens!


Fairy gardens in broken pots are not only a great way to repurpose old or damaged planters, but they also remind us that beauty can be found in imperfection.
Whether you’re creating a relaxing mini escape or simply decorating your patio with something whimsical, this is a rewarding and low-cost garden project for all ages and experience levels.
So next time a pot breaks, don’t toss it—transform it into a tiny world full of charm, creativity, and fairy dust.


