Looking for an easy and budget-friendly way to water your garden or keep the kids entertained on a hot day?
If you don’t have a store-bought sprinkler, you can make one yourself using just a plastic soda bottle, some tape, and a garden hose.
This simple DIY sprinkler takes only a few minutes to assemble and can effectively cover a large outdoor area—perfect for watering plants or turning your backyard into a fun splash zone for kids!
Materials You’ll Need:
- A 2-Liter Plastic Bottle (or any similar-sized plastic bottle)
- Electrical Tape or Duct Tape
- A Garden Hose
- A Screwdriver or Sharp Tool (for making holes)
How to Make a Homemade Sprinkler in 4 Simple Steps
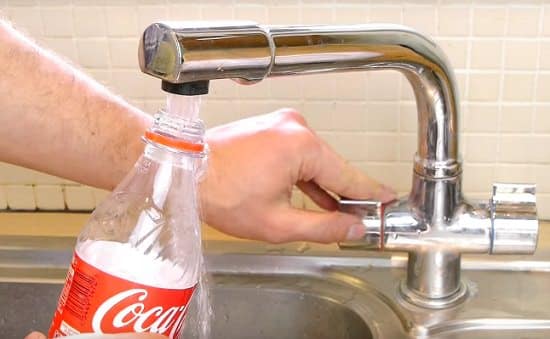
Step 1: Clean the Plastic Bottle
- Start by removing the cap and rinsing the bottle thoroughly under running water.
- If the bottle previously contained sugary or sticky liquids, wash it with a little soap to prevent clogging or attracting insects.
- No need to dry the bottle—it will be filled with water anyway!
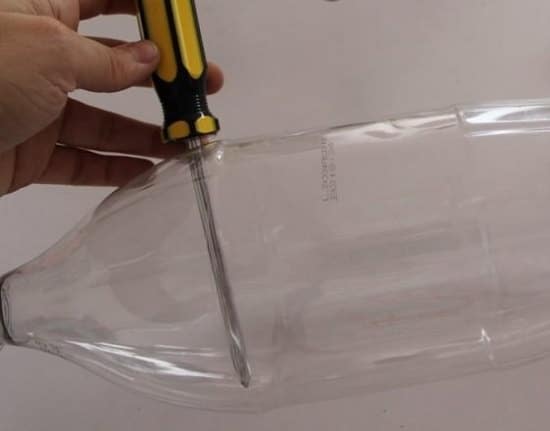
Step 2: Poke Holes for Water Flow
- Using a screwdriver, drill, or any sharp tool, make 12-14 small holes on one side of the bottle.
- Ensure the holes are evenly spaced for better water distribution.
- The size of the holes will affect the water pressure—smaller holes create a fine mist, while larger holes allow for a heavier stream.
- If you need a 360-degree sprinkler effect, make holes all around the bottle instead of just one side.
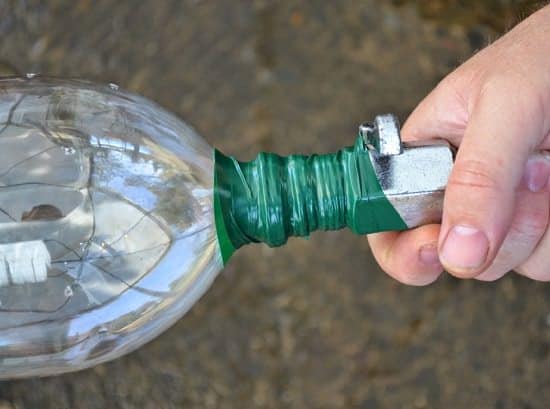
Step 3: Attach the Bottle to the Hose
- Insert the open end of the bottle into the end of your garden hose.
- Secure it tightly using electrical tape or duct tape to ensure a watertight seal.
- Make sure there are no leaks where the hose and bottle connect.
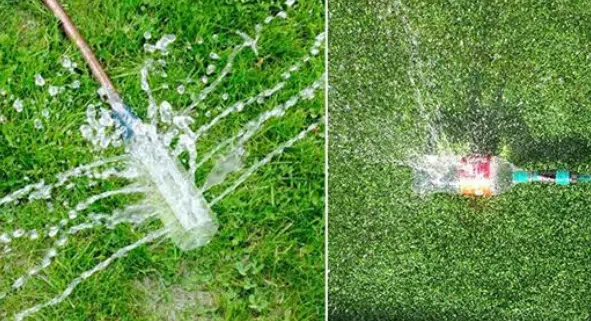
Step 4: Turn on the Water & Enjoy!
- Place the bottle on the ground in the center of the area you want to water.
- Turn on the hose slowly at first to test the water pressure.
- As water fills the bottle, it will spray out of the holes, just like a regular sprinkler!
Bonus Tip: If you want a rotating sprinkler effect, place the bottle on a slightly uneven surface or move it around periodically.
How to Turn It Into an Outdoor Shower
Want to turn your DIY sprinkler into a refreshing outdoor shower?
Follow these quick modifications:
- Instead of placing the bottle on the ground, hang it from a tree branch, clothesline, or a tall post.
- Add extra holes in the bottom of the bottle to create a rainfall effect.
- Control the water flow by adjusting the hose pressure—low pressure mimics a gentle shower, while high pressure creates a more powerful spray.
- Perfect for cooling off in the summer, rinsing off after a beach trip, or camping.
Other Creative Uses for Your DIY Sprinkler
Watering Lawns & Gardens – Move it around different sections of your yard.
Kid’s Backyard Water Fun – Let kids run through the water for hours of summer fun!
Pet Cooling Station – Keep your furry friends cool in hot weather.
Washing Outdoor Equipment – Rinse off muddy shoes, bicycles, or garden tools.
With just a plastic bottle, tape, and a garden hose, you can create a functional, low-cost sprinkler in minutes!
Whether you’re looking to water plants, entertain kids, or cool off during summer, this easy DIY project is a great alternative to store-bought sprinklers.