Growing cardamom, known scientifically as Elettaria cardamomum, offers a unique opportunity to cultivate one of the world’s most beloved spices right at home.
Originating from the lush forests of Southern India, cardamom thrives in warm, tropical climates, making it a suitable candidate for greenhouse or indoor gardening in cooler regions.
This detailed guide will explore how to successfully grow and care for a cardamom plant, ensuring you can enjoy its aromatic pods and the vibrant greenery it adds to your space.
Starting Your Cardamom Plant
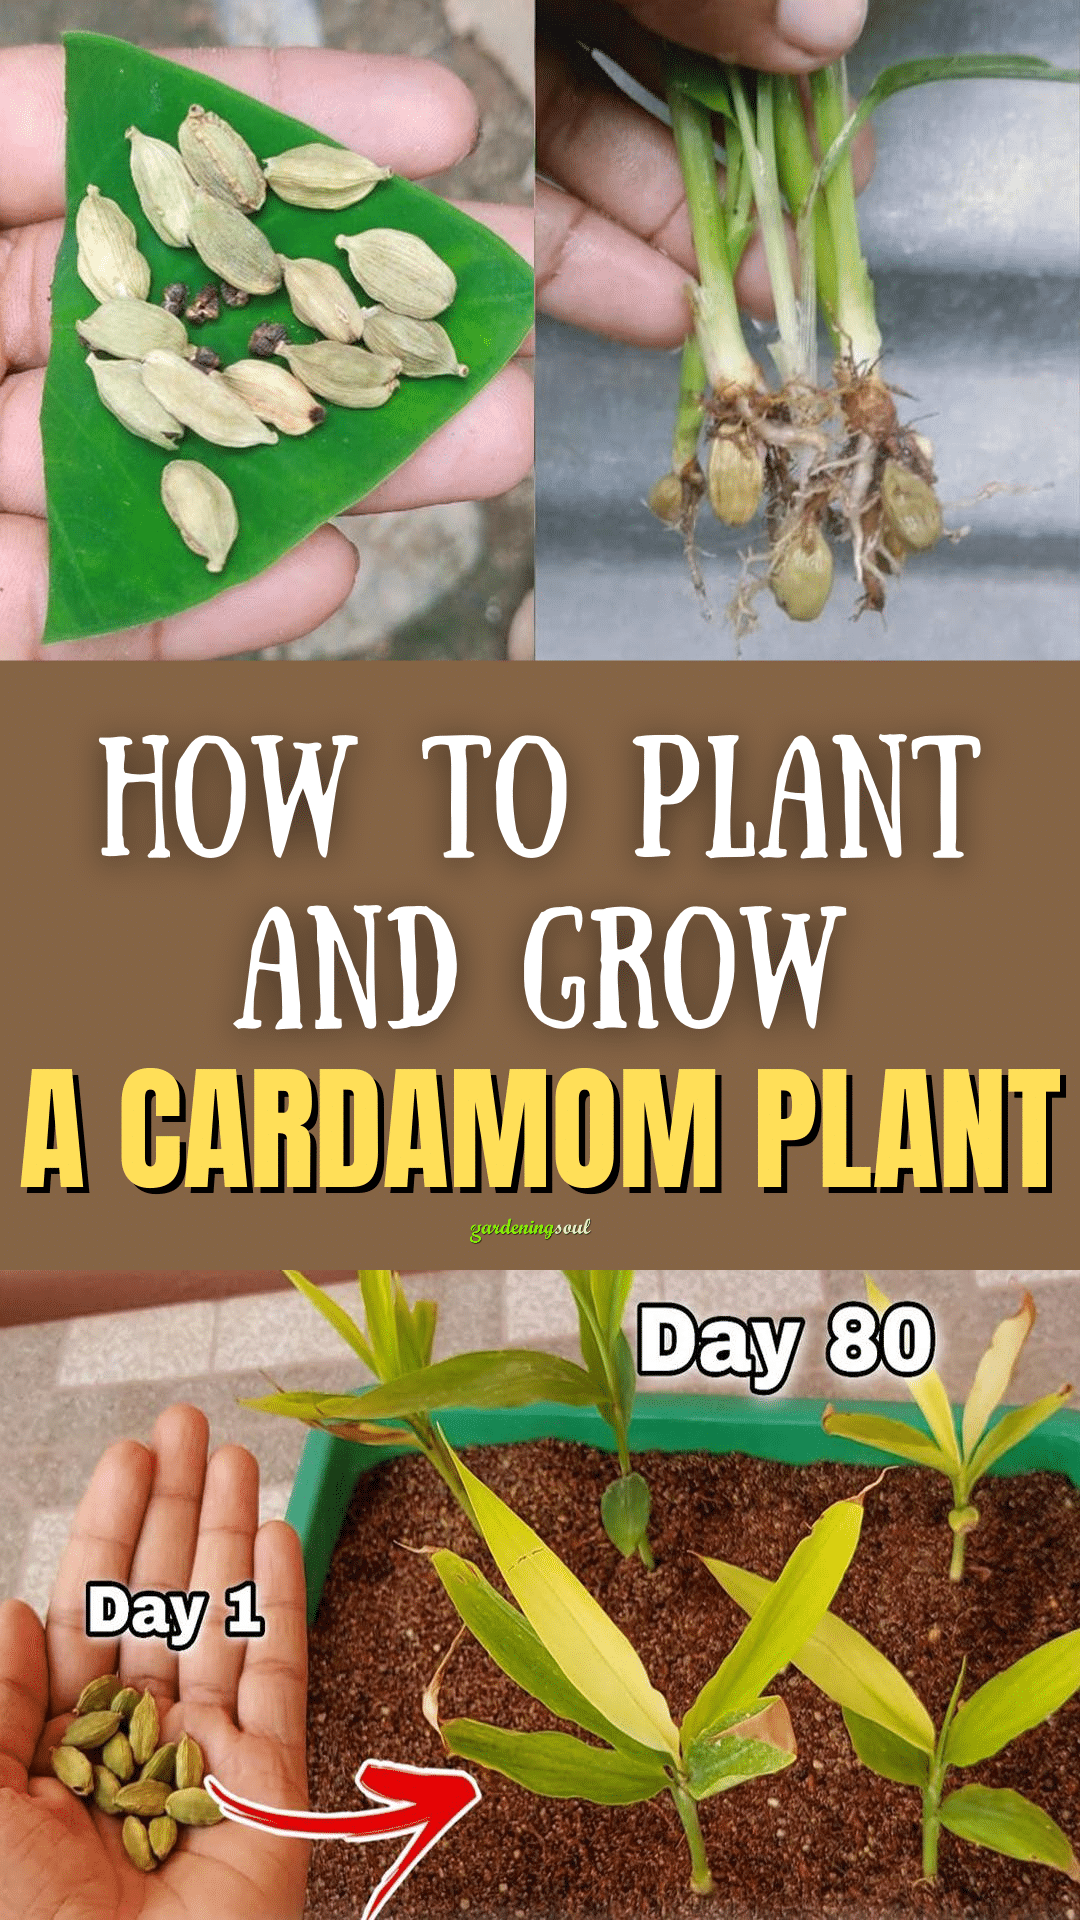
Seed Germination: Cardamom can be started from seeds, but patience is required, as germination can be slow and uneven. For best results:
- Soak the seeds in water for 24 to 48 hours to soften the outer layer.
- Plant the seeds in a well-draining, fertile potting mix. A mixture of peat, perlite, and vermiculite is ideal for retaining moisture while providing adequate drainage.
- Keep the soil consistently moist and cover the pot with plastic wrap to maintain high humidity.
- Place the pot in a warm area with indirect light. Germination can take anywhere from 20 to 40 days.
Planting a Rhizome: Alternatively, cardamom can also be propagated from rhizomes (the underground stem of the plant). Select a healthy rhizome with at least one bud. Plant it shallowly in a similar potting mix, ensuring the bud is facing upwards.
Light and Temperature Requirements
Cardamom prefers temperatures between 65°F to 85°F (18°C to 29°C) and high humidity, mimicking its native tropical environment.
It should be placed in a location that receives filtered sunlight or partial shade, as direct sunlight can scorch the leaves. If growing indoors, a south-facing window with sheer curtains provides ideal light conditions.
Watering and Humidity
Watering is critical for cardamom; the soil should be kept evenly moist but not waterlogged. Water the plant when the top inch of soil feels dry.
Overwatering can lead to root rot, so ensure pots have good drainage. To replicate the plant’s humid natural habitat, mist the leaves regularly or use a humidifier.
A pebble tray filled with water placed under the pot can also help increase surrounding humidity.
Soil and Fertilization
Cardamom does best in rich, organic soil with good drainage. A pH between 6.0 and 6.5 is ideal. Enrich the potting mix with compost or well-rotted manure to provide essential nutrients.
Fertilize every four to six weeks during the growing season with a balanced, organic fertilizer, reducing frequency in the winter months.
Pruning and Maintenance
Prune dead or yellowing leaves to encourage new growth and maintain plant health.
Cardamom plants can grow up to 10 feet tall in optimal conditions but will stay smaller indoors or in pots. To manage size and shape, prune the top growth as needed.
Pest and Disease Management
Inspect your cardamom plant regularly for signs of pests such as spider mites, aphids, and mealybugs. Treat infestations promptly with insecticidal soap or neem oil.
Avoid overwatering and ensure good air circulation to prevent fungal diseases.
Harvesting
Cardamom pods mature in about 36 to 40 months after planting. Pods are ready to harvest just before they fully ripen and open. Harvest pods by hand, selecting those that have turned from green to a slightly yellowish hue.
Dry the harvested pods in the sun or a food dehydrator to preserve their flavor. Once dried, the seeds inside the pods can be used whole or ground.
Conclusion
Growing cardamom is a long-term commitment that requires patience, especially when starting from seeds.
However, the reward of harvesting your own cardamom pods—coupled with the plant’s aesthetic appeal—makes it a worthwhile endeavor for any gardening enthusiast.
By providing the right conditions of warmth, humidity, and filtered light, along with careful watering and maintenance, you can successfully cultivate this exotic spice and enjoy its fresh, aromatic flavor in your cooking.