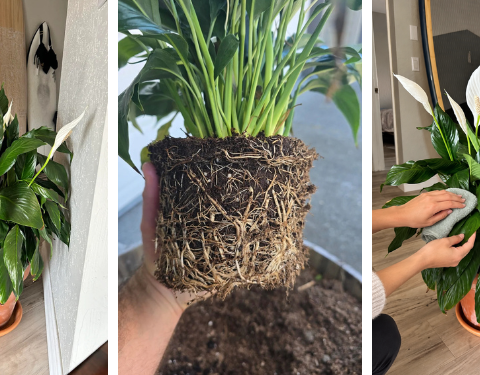
Few houseplants bring as much classic elegance to an indoor space as the Peace Lily (Spathiphyllum).
Known for its glossy, deep green foliage and striking, pristine white spathes (which look like flowers but are actually specialized leaves surrounding a central spadix), the peace lily is a favorite for homes and offices alike.
However, a very common frustration shared by plant parents is the “stubborn green stage.” You bring home a gorgeous, blooming specimen from the nursery, but after those initial white blossoms fade, the plant produces nothing but leaves for years.
Worse yet, the vibrant green foliage can sometimes start to look pale, yellowing, or frayed at the edges.
While factors like lighting and watering are critical foundational components of peace lily care, the real secret weapon to unlocking both lush, emerald leaves and a consistent cycle of white blooms is strategic fertilization.
Peace lilies are notoriously sensitive to what goes into their soil. Feeding them correctly requires understanding their unique nutritional needs, timing your applications perfectly, and avoiding common mineral buildup traps.
1. The Chemistry of Peace Lily Nutrition: Finding the Balance
To fertilize your peace lily effectively, you need to understand the three numbers printed on the front of almost every fertilizer package: the N-P-K ratio.
These letters represent Nitrogen (N), Phosphorus (P), and Potassium (K), the primary macronutrients that all plants require to survive and thrive.
Each of these three elements plays a specific role in houseplant development:
-
Nitrogen (N) – The Leaf Builder: Nitrogen is responsible for vegetative growth. It drives the production of chlorophyll, the green pigment that allows the plant to photosynthesize efficiently, resulting in large, shiny, deep green leaves.
-
Phosphorus (P) – The Bloom Booster: Phosphorus focuses heavily on structural root development and the production of flowers. Without adequate phosphorus, a peace lily will simply refuse to push out its signature white spathes.
-
Potassium (K) – The Health Protector: Potassium regulates the plant’s internal fluid balance, strengthens cellular tissue, and helps build a robust immune system to ward off pest infestations and diseases.
The Balanced Approach
Because peace lilies are grown equally for their dramatic foliage and their beautiful white blooms, choosing a specialized “bloom booster” (which has an extremely high phosphorus number) or a “foliage fertilizer” (which is overloaded with nitrogen) can throw the plant completely out of balance.
Too much nitrogen results in a massive explosion of leaves but completely suppresses flower production. Conversely, too much phosphorus can cause chemical stress to the delicate, fibrous root system.
The optimal choice is a balanced, water-soluble fertilizer, such as a 20-20-20 or a 10-10-10 ratio, diluted significantly below the manufacturer’s standard recommendation.
2. Choosing Your Formula: Liquid, Slow-Release, or Natural Organic?
Commercial fertilizers come in several distinct delivery systems. Selecting the right format depends heavily on your watering habits and how much hands-on management you prefer to dedicate to your indoor jungle.
Liquid Water-Soluble Fertilizers
This is the highly recommended golden standard for peace lilies. Liquid fertilizers are mixed directly into your watering can, allowing the nutrients to distribute evenly throughout the potting medium.
The major benefit here is control: you can easily dilute the formula to match the plant’s exact needs, and the roots can absorb the dissolved nutrients instantly.
Slow-Release Granules
Slow-release fertilizers consist of small, resin-coated pellets that you mix into the top few inches of potting soil. Every time you water the plant, a microscopic dose of nutrients is released into the dirt.
While this offers excellent convenience for busy plant owners, it does present a distinct drawback: it is very difficult to pause feeding if your peace lily enters a period of environmental stress or winter dormancy.
Organic Alternatives
For an organic approach, many indoor gardeners prefer formulas derived from liquid fish emulsion, kelp meal, or worm castings.
These options feed the microbial life within the soil, creating a long-term, self-sustaining nutrient cycle. The only downside is that indoor applications of fish emulsion can leave a noticeable, temporary outdoor scent in your living space.
Nutritional Comparisons for Spathiphyllum
How do different fertilizer types stack up when managing a sensitive indoor plant like the peace lily?
| Fertilizer Type | Nutrient Delivery Speed | Control Precision | Best For | Potential Risk |
| Diluted Liquid (Balanced) | Instantaneous | Extremely High | Regular maintenance, active bloom cycles | Frequent applications needed |
| Slow-Release Granules | Gradual (Months) | Low | Low-maintenance plant parents | Accidental over-feeding in winter |
| Fish Emulsion / Kelp | Slow to Moderate | Medium | Organic soil health, steady growth | Strong temporary odor indoors |
| High-Nitrogen Formulas | Fast | Medium | Reviving pale, yellowing leaves | Suppresses all flower development |
3. The Step-by-Step Peace Lily Feeding Routine
Because peace lilies are native to the damp, shaded floors of tropical rainforests, they are adapted to low-light conditions where growth is steady rather than explosive.
As a result, they are light feeders. Applying full-strength fertilizer will quickly scorch their roots and ruin the leaves.
To achieve the perfect balance without burning your plant, follow this precise application method:
4. Seasonal Timing: When to Feed and When to Pause
Understanding when to fertilize is just as crucial as knowing how. Indoor plants react directly to seasonal shifts in natural daylight, adapting their growth cycles accordingly.
Spring and Summer (The Active Growth Window)
From March through August, the longer days and warmer temperatures prompt the peace lily to produce new leaves and push out white flowers.
During this active phase, feed your plant once every 4 to 6 weeks using your diluted liquid formula. If your plant is positioned in bright, indirect light and growing rapidly, you can safely feed it every 3 weeks.
Autumn and Winter (The Resting Phase)
As daylight hours dwindle from September through February, the peace lily’s metabolism naturally slows down.
The plant enters a semi-dormant resting phase where it focuses on root stabilization rather than upward growth. Stop all fertilization completely during these months.
Applying nutrients when the plant is resting forces unusable mineral salts to accumulate in the soil, leading to severe leaf damage.
Annual Peace Lily Feeding Cycle:
  ├── Mar - Aug (Active Growth) ══> Feed every 4-6 weeks with 1/4 strength formula
  └── Sep - Feb (Winter Rest)   ══> STOP ALL FEEDING; give plain water only
5. Troubleshooting Fertilizer Issues: Signs of Trouble
Because peace lilies are highly expressive, they will tell you exactly how they feel about their nutritional routine. Learning to read their leaves allows you to correct problems before they threaten the survival of the plant.
Signs of Over-Fertilization
If you get too heavy-handed with the plant food, the excess mineral salts will build up in the potting soil, blocking the roots’ ability to absorb water. Look out for these telltale warnings:
-
Brown, Crispy Leaf Tips: While this can sometimes indicate low humidity, crisp brown edges that crawl up the leaf margins are a classic symptom of fertilizer salt burn.
-
A White Crust on the Soil Surface: If you notice a chalky, crusty white film forming on top of the potting soil or around the inside rim of the ceramic pot, mineral salts have accumulated to dangerous levels.
-
Sudden Wilting Despite Wet Soil: If the plant droops dramatically but the soil feels completely wet, the roots have likely been chemically burned by excess fertilizer and can no longer draw moisture up into the leaves.
The Flushing Remedy: If you suspect over-fertilization, take the plant to your sink or bathtub. Pour lukewarm, distilled water through the potting soil continuously for 5 to 10 minutes, letting it drain completely out the bottom. This process safely flushes out the accumulated mineral salts, resetting the soil environment.
Signs of Under-Fertilization
If your peace lily has been sitting in the exact same potting soil for more than a year without any supplemental food, it will eventually exhaust its available resources:
-
Pale or Yellowing Leaves: New leaves will emerge small, thin, and noticeably pale green or yellow instead of deep, glossy emerald.
-
Stunted Growth: The plant completely stops producing new foliage, even during the peak warmth of mid-summer.
-
Complete Lack of Blooms: The plant looks generally healthy but completely fails to produce a single white spathe for multiple consecutive growing seasons.
6. Pro Tips for Maximizing Pristine White Blooms
If your peace lily has beautiful green leaves but still refuses to flower, you can combine your strategic fertilization routine with a few expert environmental adjustments to encourage beautiful white blooms:
-
The Light Lever: Peace lilies can survive in low-light corners, but they will not bloom there. To trigger a flower cycle, move the plant to a location that receives bright, filtered, indirect sunlight (such as a few feet away from an east- or north-facing window). More light gives the plant the photosynthetic energy required to produce flowers.
-
The Water Quality Factor: Peace lilies are highly sensitive to the chlorine, fluoride, and hard minerals found in standard tap water. Using tap water can cause leaf tips to brown, mimicking fertilizer burn. For the absolute best results, always mix your plant food with distilled water, rainwater, or filtered water at room temperature.
-
Keep the Foliage Clean: Dust buildup on large peace lily leaves blocks out sunlight and reduces the efficiency of your fertilizer. Once a month, take a soft, damp cloth and gently wipe down each leaf to keep them clean, shiny, and fully optimized for healthy growth.
Mastering the balance of peace lily fertilization doesn’t require a professional botany degree—it simply demands a gentle, observant touch.
By providing a highly diluted, balanced formula during the warm active months and pausing completely in the winter, you give your plant the steady support it needs.