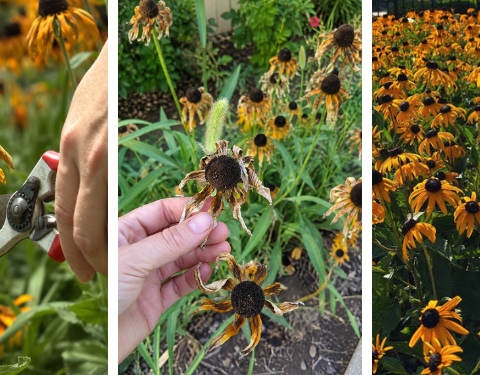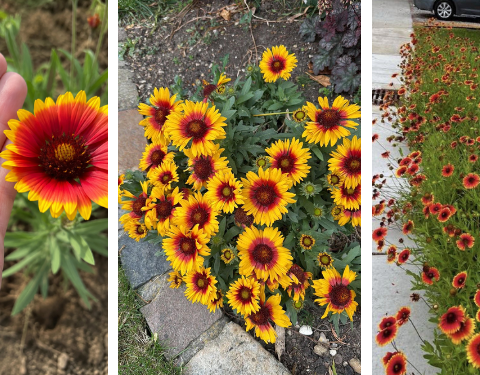
Before you pull out fading flowers and start your big fall garden cleanup, take another look at those brown, dry seed heads.
They may not be as beautiful as the flowers you enjoyed all summer, but many of them are holding something valuable:
next year’s garden – for free.
By September, many annuals and perennials have finished flowering and are busy producing mature seeds. Instead of buying new packets next spring, you can collect some of those seeds, dry them properly, store them through winter, and sow them when planting season returns.
Here are 10 flower seeds worth collecting before September ends, plus exactly how to tell when they’re ready and how to store them until next year.
1. Zinnias
If you grow zinnias, don’t throw all those faded flowers away.
Zinnias are among the easiest flowers for beginner seed savers because the seeds are relatively large and easy to handle.
Wait until the flower head has become brown, dry, and papery.
A flower that’s only slightly faded probably hasn’t finished developing mature seed yet.
Cut the dry flower head and gently pull it apart.
You’ll find seeds attached around the dried center and petals.
The important part: let them mature.
Don’t rush outside immediately after the petals lose their color.
Seeds need time to develop on the plant.
For the best chance of viable seed, select flower heads that have dried naturally on healthy plants.
Seed-saving note: Choose seeds from your healthiest, strongest, most beautiful zinnias. You’re not limited to grabbing whatever happens to be closest.
After collecting, spread the seeds somewhere dry for several days before storing them.
Will they look exactly like the parent?
Not necessarily.
If you’re growing several zinnia varieties close together, cross-pollination can occur. Hybrid varieties also may not produce offspring identical to the parent.
But that’s part of the fun.
You might get some interesting surprises next summer.
2. Marigolds
Marigolds practically invite you to collect their seeds.
Once the flower fades, the base develops into a dry seed head filled with long, slender seeds.
Wait until the flower head feels dry and papery.
Pull it from the plant and gently open the base.
Inside you’ll often find dozens of narrow seeds, usually with darker and lighter sections.
It’s one of the easiest seed-saving projects to do with children because the seeds are so easy to see and handle.
Quick tip:
Don’t collect from soggy or moldy flower heads.
Choose dry heads on a rain-free day if possible.
If rain is expected and several seed heads are almost ready, you can collect mature dry ones beforehand and finish drying them indoors.
Garden note: Don’t remove every marigold flower for seed. A few mature heads can provide plenty of seed for an average home garden.
Store only seeds that are completely dry.
Moisture is the enemy of successful winter seed storage.
3. Cosmos
Cosmos are another flower that makes seed saving wonderfully simple.
After the colorful petals fall, the center develops clusters of long, narrow seeds.
As they mature, the seeds become darker and dry.
They’re often loosely attached once fully ripe, so don’t wait too long or they’ll simply fall to the ground.
Of course, that’s not necessarily bad.
Cosmos can self-seed under suitable conditions.
But if you want to control where they grow next year, collect some yourself.
When are they ready?
Look for seed heads that are:
- Brown rather than green
- Dry to the touch
- Easy to separate
- Filled with firm, mature-looking seeds
Collect them into a paper bag or envelope.
Quick note: Cosmos seeds can drop quickly when mature. Check your plants regularly during September rather than waiting until the entire plant has turned brown.
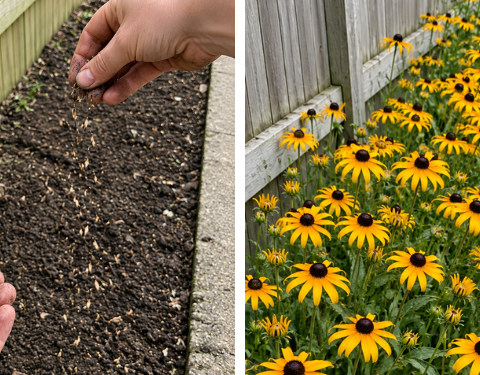
Next year, direct sow them in a sunny location after conditions become suitable.
Cosmos generally prefer plenty of sun and don’t need excessively rich soil.
4. Coneflowers
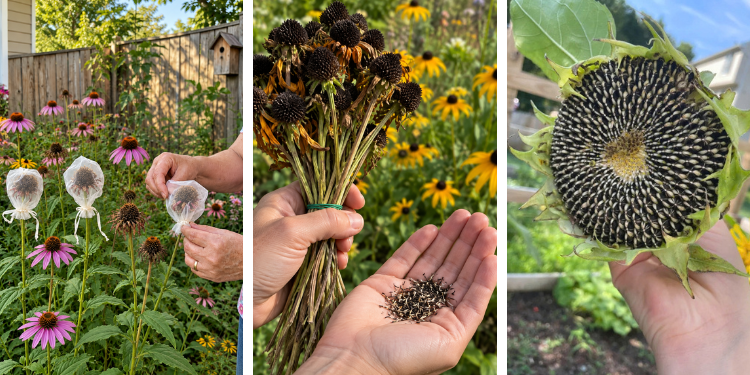
Don’t cut every coneflower seed head from your garden.
Those dark, spiky centers are useful for more than one reason.
First, mature coneflower heads contain seeds you can collect for future plants.
Second, leaving some standing provides a potential food source for seed-eating birds during fall and winter.
So compromise.
Collect some and leave some.
Wait until the flower head is brown and thoroughly dry.
Cut it and place it somewhere protected while you separate the seeds.
Gloves can be useful because the dried heads can be surprisingly prickly.
Coneflowers require patience.
Unlike fast-growing annual zinnias, coneflowers are perennials.
Seed-grown plants may spend considerable time establishing roots and foliage before giving you the big flowering display you’re imagining.
That’s normal.
Important note: Many Echinacea seeds benefit from a period of cold, moist conditions before germination. Fall or winter sowing can allow nature to provide this cold treatment.
And remember that seeds collected from named cultivars or hybrids may not produce plants identical to their parents.
If you want an exact copy of a particular coneflower cultivar, division is generally a more predictable propagation method.
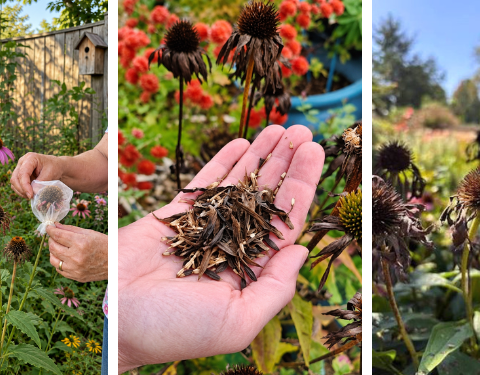
5. Black-Eyed Susans
Those dark brown centers left behind after the yellow petals disappear are worth investigating.
Black-eyed Susans (Rudbeckia) can produce large numbers of seeds.
Wait until the flower heads have become dry and mature.
Cut several heads and place them into a paper bag.
Once completely dry, you can shake, rub, or gently break apart the seed heads to release the seeds.
Don’t be surprised by how tiny they are.
Rudbeckia seeds can be mixed with lots of dried flower debris, so don’t worry about creating a perfectly clean commercial-looking packet.
You simply need to remove most of the larger chaff.
Wildlife note: As with coneflowers, consider leaving some seed heads standing rather than harvesting everything.
Birds can enjoy them, and the dried stems add structure to the winter garden.
Depending on the Rudbeckia species or cultivar you’re growing, plants may behave as annuals, biennials, or perennials, so check what you have before deciding when and where to sow.
6. Sunflowers
It’s hard to miss sunflower seeds.
But timing the harvest correctly makes a big difference.
After flowering, allow the back of the sunflower head to mature and change from green toward yellow-brown or brown.
The flower head itself should begin drying.
Seeds should look plump and developed rather than flat and immature.
There’s just one problem:
Birds know exactly what you’re waiting for.
If you want seeds for planting next year, you may have competition.
You can loosely cover a nearly mature flower head with a breathable paper bag or lightweight mesh to help protect some of the seeds while allowing airflow.
Avoid sealing a damp sunflower head inside plastic.
That can trap moisture and encourage mold.
Once the head is dry, cut it and rub the seeds free.
Quick note: Save seeds from healthy, vigorous plants with characteristics you liked—strong stems, good flowers, or whatever matters most to you.
Hybrid sunflower warning
Many modern sunflowers are hybrids.
Seeds collected from them may germinate, but the next generation may look very different from the original plant.
Open-pollinated varieties are more predictable for seed saving.
7. Calendula
Calendula produces some of the most distinctive seeds in the garden.
Instead of neat little round seeds, you’ll find strange curled, hooked, or crescent-shaped seeds where the flower used to be.
Wait until the seed head has turned brown and dry.
If you collect while the seeds are still soft and green, they’re probably not mature enough.
When ready, the seeds should separate relatively easily.
Why calendula is great for seed savers
One flower can produce plenty of seed.
And under favorable conditions, calendula may also self-seed without your help.
You can collect some for controlled planting next season and allow a few mature seed heads to drop naturally.
September note: In mild climates, calendula can be grown as a cool-season flower, so some gardeners sow it in fall rather than storing every seed until spring.
If your winters are harsh, store the seeds somewhere cool and dry and sow when conditions are appropriate.
8. Nasturtiums
If tiny flower seeds frustrate you, you’ll love collecting nasturtium seeds.
They’re large, roundish, wrinkled, and easy to see.
After the flowers fade, seed pods begin developing.
You’ll often find mature seeds around the base of the plant because they drop naturally when ready.
Don’t worry if freshly dropped seeds still look pale.
Nasturtium seeds don’t always look completely dry when they first fall.
Collect mature seeds and allow them to dry thoroughly indoors before putting them into storage.
Spread them in a single layer somewhere dry and well ventilated.
Give them plenty of time.
Large seeds can retain moisture longer than tiny ones.
Important: Never seal freshly collected, moist nasturtium seeds immediately inside an airtight container.
If moisture remains trapped, mold can ruin the entire batch.
Once thoroughly dry, label and store them for next season.
9. Hollyhocks
If your hollyhocks produced flowers this year, check the stems before cleaning them up.
After flowering, hollyhocks develop round, flattened seed pods.
Allow the pods to dry and turn brown on the plant.
When opened, you’ll find numerous flat seeds arranged inside.
They are easy to collect and easy to store.
But remember the hollyhock life cycle.
Many traditional hollyhocks behave as biennials or short-lived perennials.
A seed may germinate and produce a leafy plant during its first growing season, then flower the following year.
Some varieties can flower sooner under favorable conditions, but patience is often part of growing hollyhocks from seed.
Quick note: Don’t assume a healthy seedling has failed just because it doesn’t flower during its first season.
Hollyhocks also readily cross-pollinate, so seedlings may produce flower colors different from the plant you collected them from.
That unpredictability can create a beautiful cottage-garden mix.
10. Morning Glories
Morning glories produce obvious seed capsules after their flowers fade.
Allow the pods to become brown and dry before collecting.
Once mature, the capsule can be opened to reveal several dark seeds.
Because mature pods can eventually split and release their seeds, check them regularly as September progresses.
Collect the dry pods and allow them to finish drying indoors before separating and storing the seeds.
A word of caution:
Morning glories can self-seed aggressively in some climates.
In certain areas, related Ipomoea species can become troublesome or invasive.
Before deliberately spreading or saving large quantities, make sure the particular plant you’re growing is appropriate for your region.
Garden note: Seed saving is wonderful – but it’s still worth knowing how enthusiastically a plant reproduces before encouraging hundreds more of it.
Use Paper Bags While Collecting
Paper bags are incredibly useful for seed saving.
Write the plant name on the bag before heading into the garden.
Then cut mature seed heads directly into it.
Paper allows better airflow than sealed plastic and makes it easy to keep varieties separated.
For tiny seeds, you can also use bowls, trays, or envelopes once you’re indoors.
Let Everything Dry Before Storage
Once you bring seeds indoors, don’t immediately seal them away for winter.
Spread them on:
- Paper
- A plate
- A shallow tray
- A coffee filter
- A paper towel if seeds won’t stick to it
Keep them somewhere dry with good airflow and out of harsh direct sunlight.
The amount of drying time varies according to the seed and how dry it was when collected.
Large seeds generally require more attention than extremely small ones.
Why does this matter?
Stored seeds are alive.
They may look completely inactive, but they contain living embryos.
Excess moisture during storage encourages deterioration and mold.
Seed-saving rule: If you’re debating whether the seeds need another day to dry, give them another day.
Before September ends and you start clearing the garden for fall, collect a few envelopes of next year’s flowers.
When spring arrives and those first seedlings emerge, you’ll be glad you did.