
Roses are widely considered the crown jewel of any garden. Their timeless beauty, enchanting fragrance, and symbolism of love and elegance make them a favorite among gardeners around the world.
In fact, in a poll conducted by Bombay Outdoors with over 30,000 participants, roses topped the list as the most popular garden flower, securing a stunning 32% of the vote—far surpassing second-place zinnias, which received just 7%.
While roses are undeniably gorgeous, they also require a bit of know-how to grow successfully. Many gardeners struggle with propagating rose cuttings, as getting them to root and thrive in the soil can be challenging.
But there’s a brilliant and unexpected gardening hack that’s making waves: planting rose cuttings in a potato.
Yes, you read that right. Using a potato to root rose cuttings is an old trick that’s gaining popularity again—and for good reason.
The potato provides the cutting with a consistent source of moisture and nutrients, helping it establish roots more successfully in its early stages. If you’re looking for a budget-friendly and simple way to propagate roses, this method is well worth a try.
Why Use a Potato to Grow Rose Cuttings?
A potato may seem like an unlikely ally in your rose garden, but it offers some powerful benefits:
-
Retains moisture: Potatoes hold water well, helping prevent the cutting from drying out during root development.
-
Protects the cutting: The potato acts as a buffer, shielding the delicate stem from soil-borne diseases.
-
Provides nutrients: As the potato begins to break down in the soil, it releases organic matter that can nourish the cutting.
-
Anchors the stem: It helps the cutting stay upright and steady in the soil, promoting healthy root growth.
What You’ll Need
Before you start, gather the following materials:
-
Fresh rose cuttings (6–8 inches long)
-
A firm, healthy potato
-
A sharp knife or drill bit
-
1-liter plastic water bottles (one for each cutting)
-
Potting soil or garden soil
-
Medium-sized containers or a garden bed
Optional: Rooting hormone (to encourage faster root growth)
Step-by-Step Guide: How to Plant Rose Cuttings in a Potato
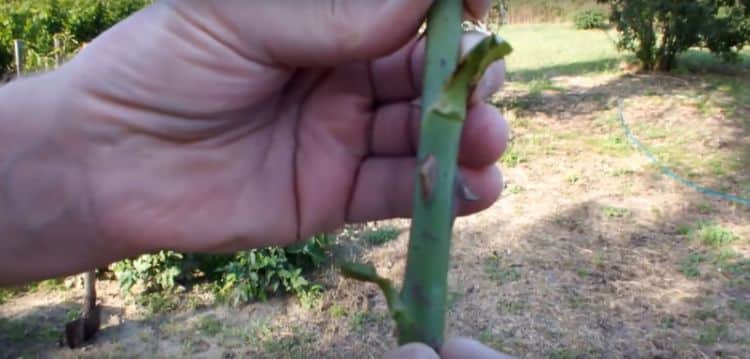
Step 1: Prepare the Rose Cutting
-
Choose a healthy rose stem that is green and flexible, not woody or dry.
-
Cut a 6- to 8-inch section just below a leaf node using clean, sharp pruners.
-
Remove all but the top two or three sets of leaves.
-
Trim off any flower buds or blooms to direct energy to root formation.
-
Carefully remove the thorns from the lower half of the cutting to reduce stress and make it easier to insert into the potato.
-
(Optional) Dip the cut end into rooting hormone to encourage faster root growth and reduce risk of rot.
Step 2: Prepare the Potato
-
Select a firm, healthy potato (avoid sprouted or soft potatoes).
-
Use a sharp knife or drill bit to create a hole in the potato that’s about 2 inches deep—just wide enough for the cutting to fit snugly.
-
Be careful not to cut all the way through the potato; you want a stable base that holds moisture.

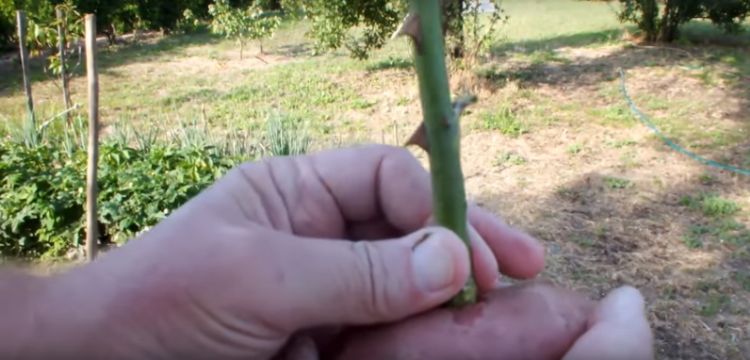
Step 3: Insert the Cutting
-
Gently push the prepared rose cutting into the hole in the potato.
-
The cutting should sit firmly without wobbling. If it feels loose, use a slightly smaller hole or add a second stem for extra support.
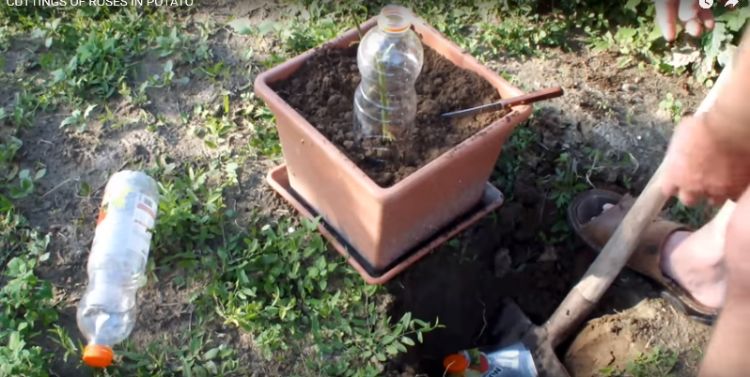
Step 4: Plant the Potato-Cutting Combo
-
Fill a medium-sized planter or garden bed about one-third full with potting soil.
-
Place the potato (with rose cutting upright) on top of the soil.
-
Gently push the potato into the soil so that it’s buried halfway or more for stability.
-
Fill in around the potato with soil, covering up to just below the leaves of the cutting.

Step 5: Create a Humid Mini Greenhouse
-
Cut the bottom off a 1-liter plastic water bottle and remove the cap.
-
Invert the bottle over the cutting to create a protective, humid environment.
-
This DIY cloche helps retain moisture and protects the cutting from wind and temperature fluctuations.
Step 6: Water and Wait
-
Keep the soil moist but not soggy. Water lightly every few days or when the top inch of soil feels dry.
-
Place the container in a bright, indirect sunlight location (avoid direct harsh sun at first).
-
In 3–6 weeks, check for resistance when you gently tug the stem—this means roots are forming!
Extra Tips to Help Your Roses Thrive
1. Feed With Banana Peels
Rich in potassium, phosphorus, and calcium, banana peels are a natural fertilizer. You can:
-
Bury chopped banana peels around the rose base (not touching the stem).
-
Blend banana peels with water and pour the liquid near the root zone.
This helps boost blooming and root health naturally.
2. Give Them Sunlight—But Not Too Much Too Soon
Young rose cuttings are delicate. While roses eventually need at least 4–6 hours of sunlight daily, newly planted cuttings should be placed in bright indirect light until they develop strong roots.
Once established, move the plant to a sunny spot to encourage blooming and strong growth.
3. Protect Against Pests
Roses are magnets for aphids, Japanese beetles, and fungal diseases. Here’s how to protect your new rose plants:
-
Use a mild soap spray (1 teaspoon of dish soap per quart of water) to keep pests at bay.
-
Space your plants well apart to improve airflow and reduce disease risk.
-
Remove dead leaves and flowers to prevent mold and fungus buildup.
Growing roses from cuttings can be deeply rewarding—but also tricky without the right environment. Using a potato as a rooting aid offers a simple, low-cost method that improves your chances of success.
This clever hack keeps the cutting hydrated, nourished, and protected while it develops strong roots.
Whether you’re growing a classic red rose or a fragrant heirloom variety, this method makes propagation accessible to gardeners of all levels.
Combine it with good sun exposure, soil care, and pest protection, and you’ll soon be rewarded with lush, blooming rose bushes that you propagated yourself.


