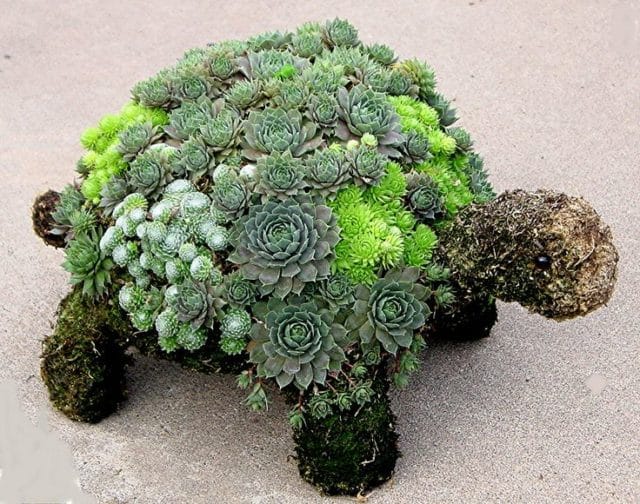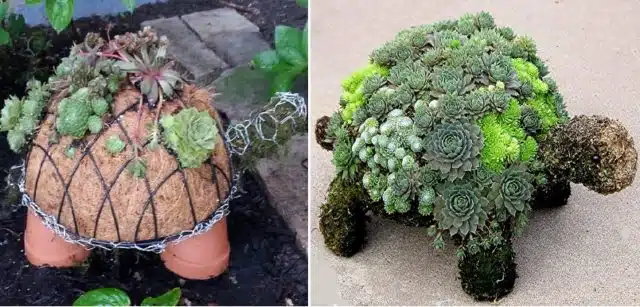
Succulent turtles are a whimsical and creative way to showcase your love for succulents while adding a playful touch to your garden or patio. These unique living sculptures resemble turtles with a lush shell made entirely of succulents!
Not only are they fun to make, but they are also low maintenance, making them perfect for beginner gardeners or DIY enthusiasts.
Follow these simple steps to create your own succulent turtle masterpiece!
What You’ll Need 🐢🌿
Before getting started, gather these materials:
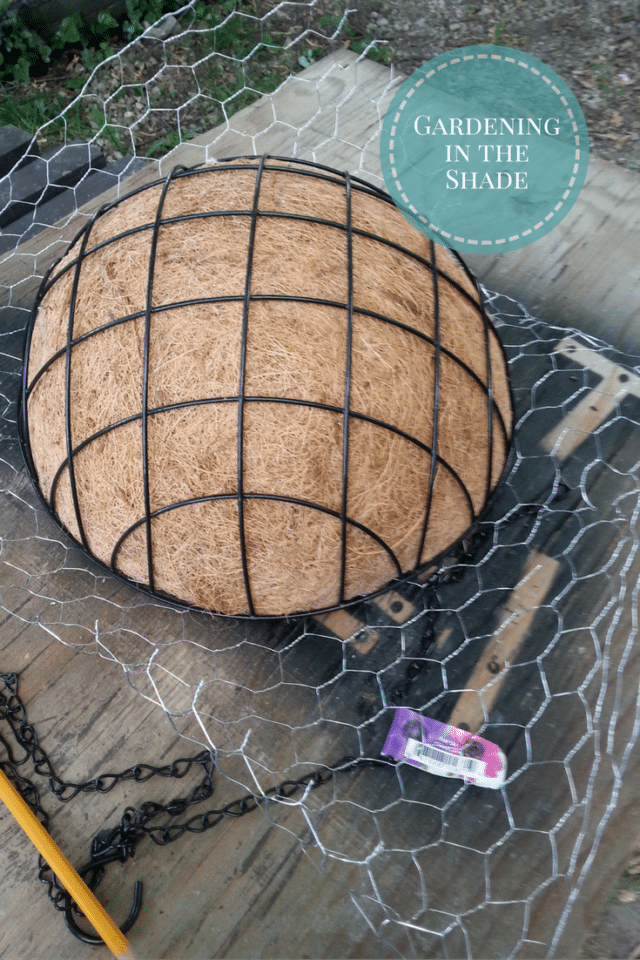
✅ 1 Wire Hanging Basket with a Coir Liner – This forms the turtle’s shell and provides a sturdy base for your succulents.
✅ 4 Small Clay Pots – These serve as the turtle’s feet, giving it a structured and natural look.
✅ Sphagnum Moss – Helps retain moisture and provides a growing medium for the succulents.
✅ A Roll of Chicken Wire – Keeps everything in place and provides support for planting.
✅ Assorted Succulents – Choose a variety of small succulents with different textures and colors for a visually appealing turtle shell.
✅ Soil for Succulents – A well-draining cactus or succulent mix works best.
✅ Scissors and Wire Cutters – For shaping the chicken wire and assembling the turtle.
✅ Hot Glue Gun or Waterproof Adhesive – Helps secure the feet (optional).
✅ Small Decorative Stones or Pebbles – Optional, but can be used to create added texture on the turtle shell.
Step-by-Step Instructions 🐢
Step 1: Prepare the Turtle Shell (Hanging Basket Base)
- Take your wire hanging basket with a coir liner and turn it upside down—this will act as the turtle’s shell.
- Fill the basket with sphagnum moss, pressing it down firmly to ensure stability.
- Add a layer of succulent soil inside the moss for the plants to grow.
✅ Tip: Soak the sphagnum moss in water for 10–15 minutes before using it—this helps retain moisture for the succulents.
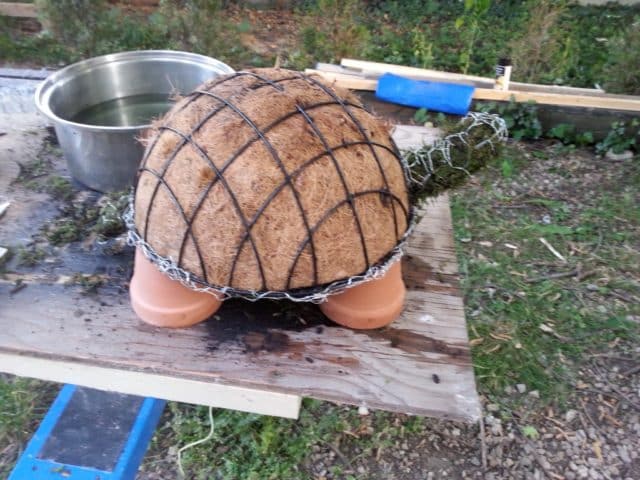
Step 2: Attach the Turtle’s Legs (Clay Pots)
- Position the four small clay pots at the bottom of the upside-down basket to serve as legs.
- Use hot glue or waterproof adhesive to attach them securely. If using glue, allow it to dry completely before moving to the next step.
- If you prefer a non-glue method, you can wedge them in place with extra moss or wire.
✅ Tip: Choose small, sturdy clay pots that match the basket size for the best proportion.
Step 3: Secure the Chicken Wire Over the Shell
- Cut a piece of chicken wire large enough to cover the coir basket.
- Carefully mold it over the surface, securing the edges to keep everything in place.
- This step prevents the succulents from shifting and helps them grow neatly into the shell shape.
✅ Tip: Use gloves when handling chicken wire to avoid scratches!
Step 4: Plant the Succulents to Create the Shell
- Using small succulent cuttings, insert them through the gaps in the chicken wire into the soil and moss.
- Arrange different varieties of succulents for a layered, textured look—mix colors like green, purple, and blue-toned succulents for contrast.
- Secure loose plants with small floral pins if needed.
✅ Best Succulents to Use:
- Sedum (low-growing and colorful)
- Echeveria (rosette-like for a floral touch)
- Hens and Chicks (Sempervivum) (great for covering large areas)
- Crassula (adds variety in leaf shape)
Step 5: Give Your Turtle a Cute Face (Optional!)
- For extra charm, place two small pebbles or black beads as eyes on the front of the basket.
- You can even attach a small succulent or moss ball as a head.
✅ Bonus Idea: Use a painted clay pot as the turtle’s head for an even cuter look!
Caring for Your Succulent Turtle 🐢💚
Once your succulent turtle is assembled, you’ll want to keep it healthy and thriving!
🌞 Light: Place your turtle in a bright spot with indirect sunlight. If outdoors, partial sunlight is best to prevent scorching.
💦 Watering:
- Water your turtle lightly once a week, allowing the moss to dry between waterings.
- Use a spray bottle to mist the succulents, ensuring they get moisture without overwatering.
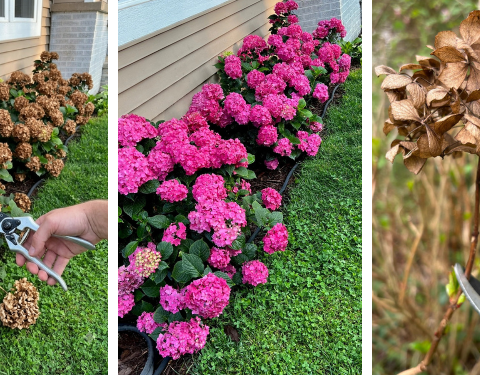
🍂 Pruning & Maintenance:
- Trim any overgrown succulents to maintain the turtle’s shape.
- If any plants die off, replace them with new cuttings to keep it looking full.
🌱 Fertilizing: A light dose of succulent fertilizer every few months can encourage growth.
Why You’ll Love Making a Succulent Turtle!
✔️ Low Maintenance – Succulents require minimal care, making them perfect for busy plant lovers.
✔️ Eco-Friendly – This project upcycles materials and supports sustainable gardening.
✔️ Great for Kids & Beginners – Fun, hands-on activity that anyone can do.
✔️ Unique & Eye-Catching – A succulent turtle adds a creative touch to any garden, patio, or indoor space.
Final Thoughts: Get Creative with Your Succulent Turtle!
Succulent turtles are a fun and rewarding DIY project that bring charm and greenery to your space. Whether you’re a gardening expert or a beginner, this project is easy, inexpensive, and incredibly cute!
So gather your materials, get creative, and start building your very own succulent turtle today!