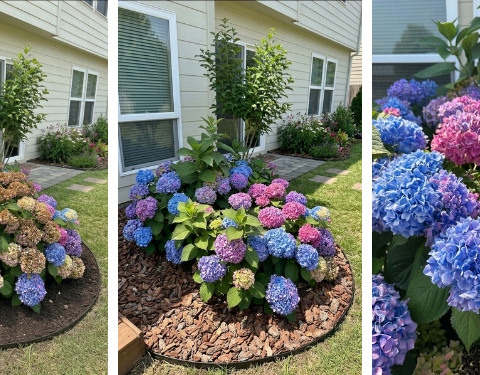
Hydrangeas (Hydrangea macrophylla, H. paniculata, and H. quercifolia) are the undisputed architects of the summer garden.
Their oversized blooms and lush, architectural foliage can transform a simple backyard into a professional-grade landscape. However, purchasing established shrubs from a nursery can be a significant financial investment.
Propagating hydrangeas in May is the most effective way to multiply your collection for free. By utilizing softwood cuttings, you take advantage of the plant’s peak spring vitality.
During this window, the hydrangea is surging with growth hormones, and the stems are flexible enough to root quickly but firm enough to resist rot.
The Biological Advantage of May Propagation
While hydrangeas can be propagated from hardwood cuttings in the winter, May propagation utilizes softwood material. Softwood is the brand-new growth of the current season.
In May, the sap is flowing at its highest velocity. The cells at the nodes of these stems are “meristematic,” meaning they have the potential to differentiate into roots rapidly.
Cuttings taken in May typically establish a robust root system by mid-summer, allowing the young plant to go dormant in autumn as a fully independent, resilient shrub.
1. Preparing Your Propagation Kit
Success in propagation is 10% cutting technique and 90% environmental control. Before you head to the garden, assemble the following:
| Tool | Purpose |
| Bypass Pruners | Must be razor-sharp to prevent crushing the delicate vascular tissue. |
| 70% Isopropyl Alcohol | To sterilize tools and prevent the spread of fungal pathogens. |
| Propagation Medium | A 50/50 mix of perlite and peat moss (or coco coir). Avoid garden soil. |
| Rooting Hormone | Indole-3-butyric acid (IBA) powder or gel to accelerate root initiation. |
| Deep Trays or 4-inch Pots | Ensure they have multiple drainage holes. |
2. Selecting the “Perfect” Cutting
Not every branch on a hydrangea is suitable for propagation. To ensure a massive shrub, you must select for vigor.
-
The Non-Flowering Rule: Look for stems that do not have a flower bud at the tip. A stem with a bud is diverting its energy into reproduction (flowering); you want a stem that is focused on vegetative growth.
-
The “Snap” Test: The stem should be bright green and flexible. If you bend it, it should feel firm but not woody. Ideally, choose a shoot that is 5 to 6 inches long with at least two or three sets of leaves.
-
Timing: Always take your cuttings in the early morning. This is when the plant is at maximum turgidity (fully hydrated). A cutting taken in the heat of the afternoon has already lost vital moisture, which significantly lowers its success rate.
3. The Precision Cutting Technique
Once you’ve identified your candidate, follow this specific anatomical protocol:
-
The Primary Snip: Cut the stem about 1/2 inch below a node (the bump where leaves emerge). This area is a “rooting hotspot.”
-
The Leaf Strip: Carefully remove the bottom set of leaves. You should be left with one or two sets of leaves at the very top.
-
The Leaf Reduction: This is a professional secret. If the remaining leaves are large (common in Mophead hydrangeas), cut the leaves in half horizontally. This reduces the surface area, preventing the cutting from losing too much water through transpiration while it has no roots to drink with.
-
The Hormone Dip: Scrape the bottom 1/4 inch of the stem skin slightly to expose the cambium layer, then dip it into your rooting hormone.
4. Creating the “Incubation” Environment
Hydrangea cuttings don’t just need water; they need a specific atmospheric humidity to survive the transition.
-
Potting: Use a pencil to make a hole in your perlite/peat mix. Insert the cutting so that the bare nodes are submerged. Firm the mix around the stem to ensure there are no air pockets.
-
The Humidity Dome: Cover the pots with a clear plastic bag or a plastic dome. Use sticks to prop the plastic up so it doesn’t touch the leaves. This creates a “mini-greenhouse” that keeps the humidity at near 100%.
-
Light and Heat: Place the tray in a bright area with indirect light. Direct May sunlight will cook the cuttings under the plastic. A consistent temperature of 18°C to 22°C (65°F to 72°F) is ideal.
5. The Transition: From Cutting to Shrub
In approximately 3 to 4 weeks, your cuttings will begin to develop roots. You can test this by giving a very gentle tug on the stem; if you feel resistance, the roots have taken hold.
Hardening Off
Once roots are established, you must “harden off” the plants. Start by removing the plastic dome for an hour a day, gradually increasing the exposure over a week. This prevents the “shock” of moving from a humid environment to the drier ambient air.
Potting Up
By late June, move your new hydrangeas into individual 1-gallon pots filled with a high-quality potting mix. Incorporate a slow-release, balanced fertilizer at this stage to encourage massive foliage growth.
6. Planting Out for Massive Results
To ensure your new hydrangeas grow into “massive” shrubs, the planting site is key.
-
The Afternoon Shade Rule: Most hydrangeas (especially H. macrophylla) thrive with morning sun and afternoon shade. The intense 2:00 PM sun can wilt even established plants.
-
Hydration Management: The name “Hydrangea” comes from the Greek “hydor” (water). These plants are thirsty. Mulch heavily with shredded bark or compost to keep the root zone cool and moist.
-
Spacing: For a massive, hedge-like appearance, space your new plants 3 to 4 feet apart. This allows for enough airflow to prevent powdery mildew while ensuring the shrubs eventually knit together into a solid wall of color.
Propagating hydrangeas in May is a rewarding bridge between the science of botany and the art of garden design.
By following these steps – focusing on morning harvests, node precision, and humidity control – you can turn a single favorite plant into a sprawling landscape of summer color.