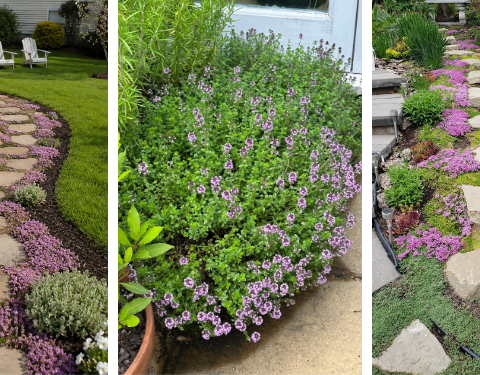
If you’ve ever dreamed of having your own lush garden but find yourself limited by space, there’s no need to give up on that vision.
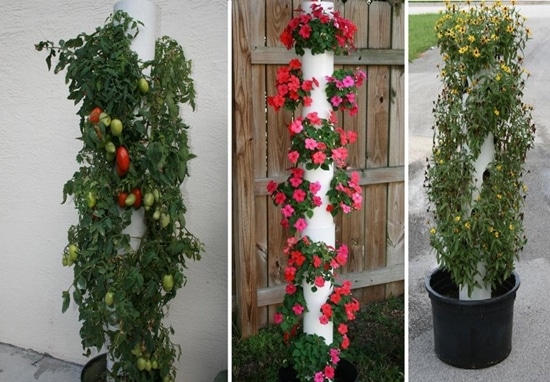
Whether you’re working with a small backyard, apartment balcony, or tiny urban patio, a DIY vertical PVC planter is a smart, space-saving way to grow herbs, flowers, strawberries, and leafy greens.
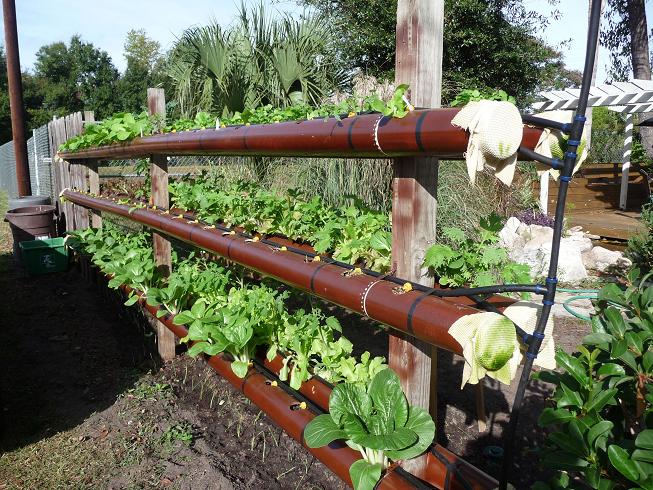
Vertical gardening allows you to maximize your planting area by growing upward instead of outward. A PVC planter is not only practical and affordable, but it’s also eco-conscious. It conserves water through vertical irrigation and uses recycled or repurposed materials.
Plus, the sleek cylindrical design of PVC pipe looks modern, clean, and compact—perfect for tight corners and vertical walls.
In this guide, you’ll learn how to build your own vertical PVC garden using simple tools and materials—most of which you may already have at home.

Why a Vertical PVC Planter?
-
Maximizes growing space: Perfect for small gardens, balconies, patios, or even indoor areas
-
Efficient watering system: Water flows down from the top, minimizing waste and keeping each level hydrated
-
Weed-free growing: Plants are tucked into upright pockets, reducing weed intrusion
-
Recyclable and reusable: PVC is weather-resistant and long-lasting
-
Portable: Move your planter to chase sunlight or bring it indoors during bad weather
What You’ll Need
Here’s everything required to create your own vertical planter:
Tools:
-
Electric drill
-
Hole cutting bit (to cut 5–7 cm diameter holes for planting)
-
2 or 3 mm drill bit (for the watering pipe)
Materials:
-
1 PVC downpipe (100mm or 150mm diameter, and your chosen height—typically 3 to 5 feet)
-
PVC end cap (fits the base of the downpipe to hold soil in)
-
1 thinner pipe (about 15–20mm in diameter, 8–10cm taller than the main pipe—used for watering)
-
Cork (to plug the watering pipe at the base)
-
Geotextile fabric or hessian (for wrapping the watering pipe to help distribute water evenly)
-
Twine or garden wire (to secure fabric to the watering tube)
-
Coarse gravel (for bottom drainage layer—around 1 liter)
-
Fertile potting mix (strawberries, herbs, and leafy greens thrive in slightly acidic, well-draining soil)
-
Your choice of plants (strawberries, lettuce, parsley, basil, mint, flowers)
-
Duct tape
-
Knife or garden scissors
-
A large tub or box (to stand the unit in while filling with soil)
-
Fixing collar or sturdy wall ties (to secure the planter in place)
Step-by-Step Instructions
Step 1: Cut Planting Holes
Using your hole saw attachment on a drill, cut evenly spaced holes along the side of the main PVC downpipe. These will be the planting pockets.
-
Hole size: 5 to 7 cm in diameter
-
Spacing: About 6 to 8 inches apart vertically and staggered on alternating sides for even coverage
-
Tip: Mark hole locations with a marker beforehand to keep spacing even
Step 2: Prepare the Watering Pipe
Take your thinner PVC pipe and drill small holes (2-3mm) along the entire length, focusing on the side that will face outward in the planter. These will slowly release water to each layer of the vertical garden.
-
Plug the bottom with a cork or rubber stopper
-
Wrap the pipe with geotextile or hessian fabric to prevent soil clogging the holes
-
Secure with twine or zip ties every few inches
Make sure the watering pipe is longer than the main pipe so it can easily be accessed for refilling.
Step 3: Assemble the Base
Attach a PVC end cap to the bottom of the main pipe to hold everything inside.
-
Pour in 1 liter of coarse gravel for drainage
-
Place the watering pipe in the center
This base will help prevent water pooling and promote even moisture distribution throughout the soil column.
Step 4: Add Soil and Plant
Stand the PVC pipe upright inside a large tub or planter box to help it stay stable while you fill it.
-
Start filling the main pipe with moist potting soil, gently tamping down as you go
-
Once you pass a planting hole, insert a plant or seedling into the opening
-
Use a stick or your fingers to guide the roots into the center of the pipe
-
Continue adding soil and inserting plants until you reach the top
You can plant the top of the pipe as well—ideal for trailing herbs or flowers.
Step 5: Secure the Planter
Once full, move the vertical garden into place and secure it with ties or a collar bracket to prevent tipping. This is especially important if the planter will be placed on a windy balcony or deck.
-
Secure to a fence post, wall, or railing
-
If placing indoors, anchor it into a heavy planter box or use a stand
How to Water
To water your vertical planter, simply pour water into the top of the watering pipe using a funnel or watering can. The water will slowly seep out through the holes in the fabric-wrapped pipe, evenly irrigating every plant layer from top to bottom.
-
For hot climates or shallow-rooted plants, water daily
-
In cooler climates, every 2–3 days is usually sufficient
Optional: Add liquid fertilizer into the water once every two weeks for extra nourishment.
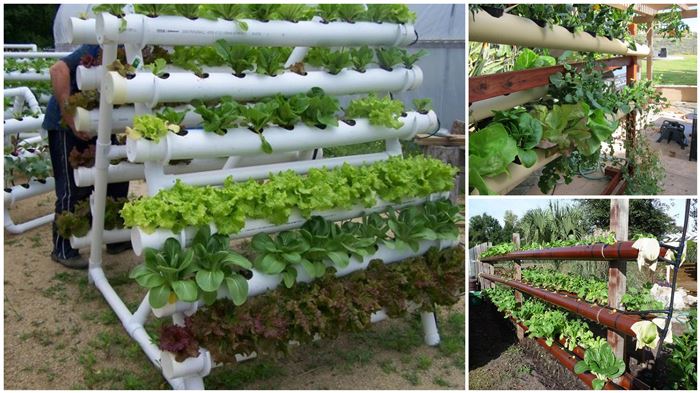
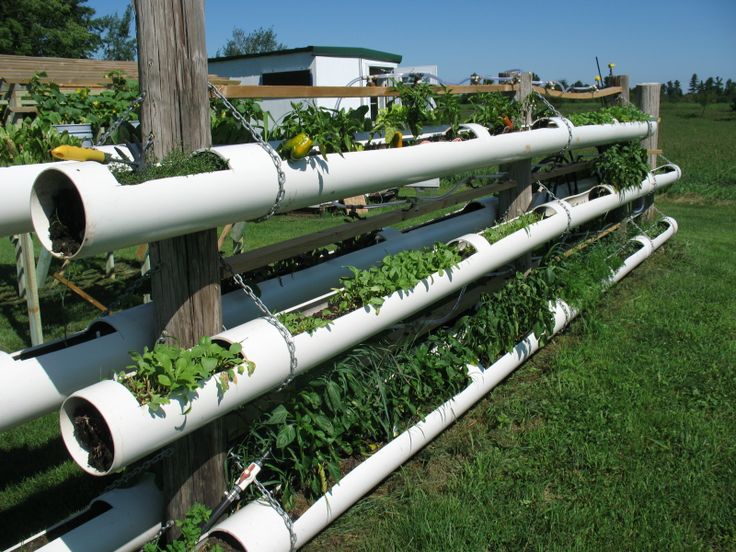
Best Plants to Grow in a Vertical PVC Planter
-
Strawberries (perfect for side pockets)
-
Leafy greens: Lettuce, spinach, kale, Swiss chard
-
Herbs: Basil, parsley, cilantro, thyme, oregano, mint
-
Edible flowers: Nasturtiums, pansies, violas
-
Small ornamental plants: Petunias, begonias, lobelia
Avoid deep-rooted or large vegetable plants like carrots, tomatoes, or peppers, as they require more soil depth and support than this system allows.

A DIY vertical PVC planter is an incredibly effective and rewarding way to garden in small or unconventional spaces.
It’s an affordable project that anyone with a few basic tools can complete in a weekend—and it brings big returns in the form of beauty, fresh herbs, and homegrown produce.
This vertical growing method is also a smart solution for renters, apartment dwellers, or anyone looking to make their garden more efficient and eco-friendly.
With water-conserving irrigation and minimal space requirements, this project helps bring gardening within reach for anyone, anywhere.