
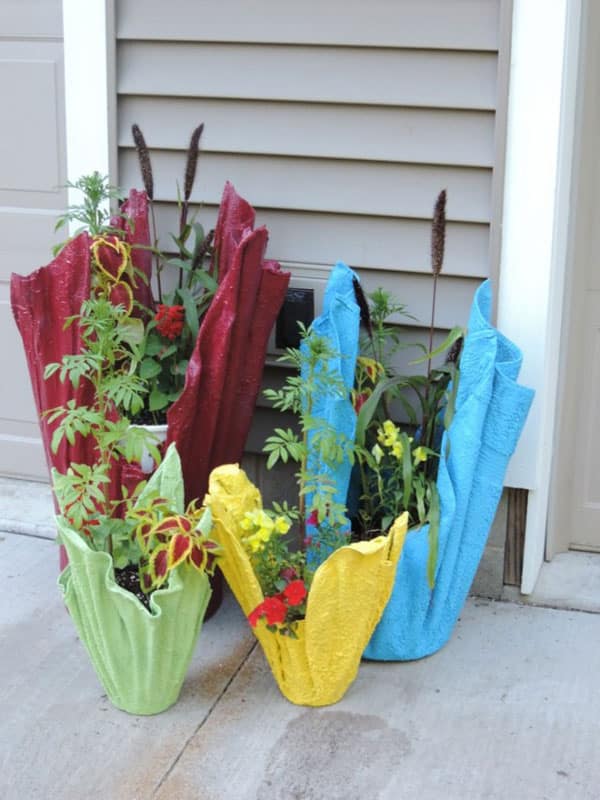
If you’re looking for a unique, artistic way to add character to your garden or patio, crafting a draped planter from an old towel and concrete is a must-try project.
This eye-catching planter, also known as a cement towel planter or hypertufa planter, combines sculptural form with functional gardening space, turning a simple towel and some cement into a rustic, stone-like container that brings texture and charm to any outdoor setting.
Whether you’re a seasoned DIY enthusiast or just starting out, this project is affordable, beginner-friendly, and a fantastic way to upcycle old fabrics while giving your garden a personalized touch.
Plus, these planters are incredibly durable, weather-resistant, and can be customized in size, shape, and color.
In this guide, you’ll learn exactly how to make a draped cement planter using an old towel, how to style it in your garden, and why this eco-friendly project is trending among home gardeners and crafters alike.
What Is a Draped Concrete Planter?
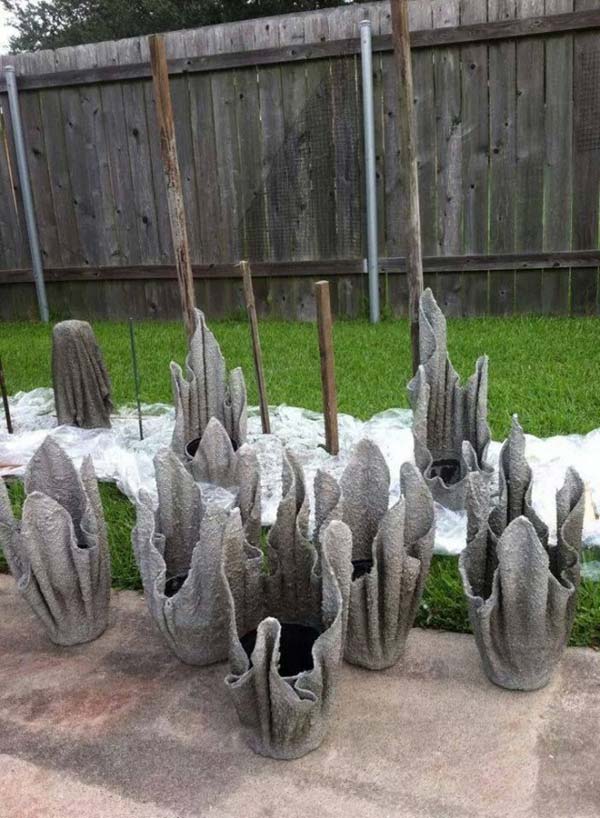
A draped concrete planter is a sculptural container made by soaking a piece of fabric—usually a towel, blanket, or old rag—in a cement slurry and draping it over a mold or support structure.
As the mixture hardens, the towel holds its shape, creating folds and curves that mimic the flow of fabric but solidify into a stone-like finish.
These planters are ideal for succulents, flowers, or ornamental plants and look stunning in both rustic and modern garden settings.
Materials You’ll Need
To make your own draped planter, gather the following materials:
-
One old towel or fabric piece (cotton or polyester blend works well; size depends on your desired planter size)
-
Portland cement or quick-set cement
-
Water
-
Bucket or container for mixing
-
Plastic gloves
-
A mold or support base (inverted bucket, bowl, or flower pot)
-
Plastic sheeting, trash bags, or tarp (to protect your workspace)
-
Optional: paint or concrete dye (for added color or finish)
Tip: Don’t use cement that contains large aggregate (like gravel), as it will be too chunky for this project. Choose Portland cement or mortar mix for a smoother result.
Step-by-Step Instructions
Step 1: Prepare Your Workspace
Lay down plastic sheeting or a tarp in a well-ventilated area. Since cement can be messy and irritating to the skin, wear gloves and old clothes.
Place your mold (like an upside-down bucket or bowl) on the plastic. This will be the shape your planter drapes over.
Step 2: Mix the Cement Slurry
In a bucket, mix Portland cement and water until you achieve a thick pancake-batter consistency. The ratio is typically about 2 parts cement to 1 part water, but you can adjust as needed. Stir until there are no lumps.
If desired, add a small amount of concrete dye or paint to color your planter at this stage.
Step 3: Soak the Towel
Completely submerge your old towel in the cement slurry. Let it soak thoroughly so the entire towel is saturated. Use your gloved hands to knead the towel in the mixture, making sure the cement reaches every fiber.
Step 4: Drape the Towel
Carefully lift the towel and let the excess slurry drip off. Then, drape the towel evenly over your mold. Let it fall naturally to create folds, curves, and texture.
Adjust the corners and edges so they create a balanced look and ensure that it doesn’t touch the ground—this allows airflow for better drying.
The way the towel is draped will determine the planter’s final shape, so take your time to make it visually appealing.
Step 5: Let It Dry and Harden
Allow the towel to dry for 24 to 48 hours, depending on humidity and temperature. You want the cement to cure fully. After it’s dry, gently lift the planter off the mold. It should hold its shape and feel solid.
Let the planter continue curing for another 2–3 days in a dry, shaded area. Cement continues to strengthen over time.
Optional: Sanding, Sealing, or Painting
Once your draped planter is fully dry, you can enhance its appearance:
-
Smooth any rough edges using sandpaper or a sanding sponge.
-
Seal the surface with a clear concrete sealer if you want added weather protection, especially for outdoor use.
-
Paint the planter with outdoor acrylic paints or chalk paint to match your garden aesthetic. Metallic or aged finishes look especially striking.
Best Plants for Draped Cement Planters
Because draped planters can have a shallow or wide bowl shape, they’re ideal for:
-
Succulents (like sedum, echeveria, or hens-and-chicks)
-
Trailing plants (like string of pearls, creeping Jenny, or ivy)
-
Herbs (thyme, oregano, or mint)
-
Small flowering plants (like pansies, violas, or petunias)
Be sure to drill a small drainage hole in the bottom if you’re planting directly into the planter, or place a nursery pot inside to preserve moisture control.
Styling Ideas for Draped Planters
These sculptural planters are statement pieces that enhance any outdoor or indoor space.
Here’s how to use them creatively:
-
Line a garden pathway with a set of varied-sized planters
-
Display on a patio table with colorful succulents
-
Hang them as wall-mounted baskets for a rustic garden accent
-
Use them indoors on a windowsill or shelf with low-maintenance plants
-
Create a tiered display by stacking draped planters of different sizes
Why This DIY Project Is Worth Trying
-
Eco-friendly: Repurposes old towels and avoids plastic pots
-
Inexpensive: Uses basic materials available at most hardware stores
-
Artistic: Every planter is one-of-a-kind
-
Durable: Withstands the elements and lasts for years
-
Beginner-friendly: No special tools required
Creating a draped planter from an old towel is a fantastic way to combine art, gardening, and sustainability into one creative weekend project.
Whether you’re enhancing your backyard oasis or adding a unique feature to your indoor garden, this DIY planter offers beauty, functionality, and long-lasting charm.


