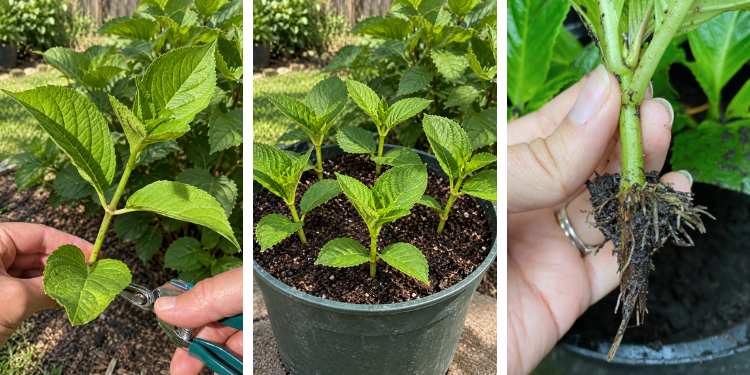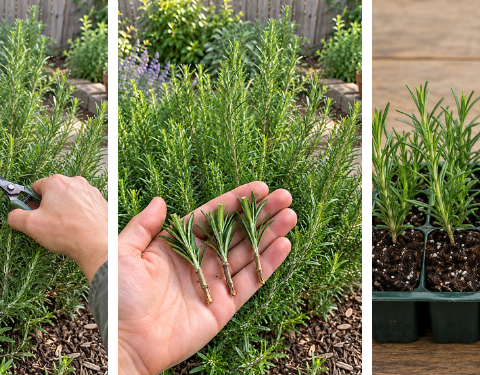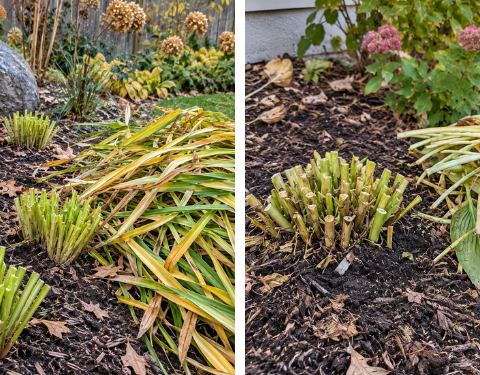
If you have a hydrangea you absolutely love, September can be a surprisingly good time to make more of it.
Here are 7 simple steps to propagate hydrangeas from cuttings this September and give them the best chance of becoming strong young plants for next year.
1. Choose a Healthy Non-Flowering Stem
Everything starts with the cutting you choose.
Look for a healthy hydrangea stem that:
- Has fresh green growth
- Shows no signs of disease
- Isn’t badly damaged by insects
- Has several sets of leaves
- Isn’t currently carrying a flower
Non-flowering shoots are usually the best choice because they can direct more energy toward producing roots rather than supporting a bloom.
Try to select growth that is still flexible rather than very old, thick, and woody.
A stem around 4–6 inches long is usually plenty.
Best time to take the cutting
Take your cutting in the morning if possible, when the plant is well hydrated.
Avoid taking cuttings during the hottest part of a sunny afternoon, particularly if the plant is already wilting.
And if the soil around your hydrangea has been extremely dry, watering the plant the day before can help ensure the stems are well hydrated.
2. Make the Cut Just Below a Leaf Node
Once you’ve found a healthy stem, use clean, sharp pruners or scissors.
Cut the stem just below a leaf node.
A node is the point along the stem where leaves emerge.
This area is important because nodes contain tissues capable of producing new growth and roots.
Your cutting should ideally contain at least two or three nodes.
Before cutting:
Clean your scissors or pruners.
This reduces the chance of transferring disease from one plant to another.
A smooth, clean cut is also much better than crushing or tearing the stem.
Quick tip:
Take a few extra cuttings.
Not every cutting will root successfully, so starting with several gives you a much better chance of ending up with healthy new hydrangeas.
3. Remove the Lower Leaves
Now prepare the cutting.
Remove the leaves from the bottom half of the stem.
You want at least one or two exposed nodes below the remaining foliage.
These lower nodes are where roots are likely to develop once the cutting is placed into the growing medium.
Leave a pair of healthy leaves near the top.
Why remove the lower leaves?
Leaves buried in damp potting mix can rot.
Removing them also reduces the amount of foliage the young cutting has to support before it develops a root system.
But don’t remove every leaf.
The cutting still needs some foliage for photosynthesis.
4. Cut Large Leaves in Half
Hydrangeas have relatively large leaves.
That creates a challenge for an unrooted cutting.
Large leaves lose water through transpiration, but the cutting doesn’t yet have roots capable of replacing that moisture efficiently.
One simple trick is to cut the remaining large leaves roughly in half.
Use clean scissors and cut across each leaf.
This reduces leaf surface area while still leaving enough green tissue for photosynthesis.
You don’t always need to do this.
If the leaves are naturally small, you can leave them alone.
But for large-leaved hydrangeas, reducing the foliage can make moisture management easier.
Important:
Don’t damage the central growing point at the top of the cutting.
That’s where future growth will develop.
5. Plant the Cutting in a Light, Moist Growing Mix
Now it’s time to plant.
Use a small container with drainage holes.
Fill it with a light, well-draining propagation medium.
A mix containing materials such as:
- Seed-starting mix
- Fine potting mix
- Perlite
- Vermiculite
can work well.
The medium should hold some moisture without becoming heavy and waterlogged.
Before planting
Moisten the mix first.
It should feel evenly damp but not dripping wet.
Then make a small hole with your finger, pencil, or dibber.
Insert the bottom portion of the cutting so that at least one exposed node is below the surface.
Firm the mix gently around the stem.
Optional rooting hormone
You can dip the cut end into rooting hormone before planting.
Hydrangeas often root without it, but rooting hormone may improve consistency.
If you use it, follow the product directions and avoid putting a wet cutting directly into the original container of powder, as this can contaminate the product.
6. Create a Humid Environment While Roots Develop
Once the cutting is planted, moisture becomes extremely important.
Remember:
The cutting has leaves, but almost no roots.
That means it can lose water faster than it can replace it.
Creating higher humidity around the leaves can help reduce water loss during the rooting period.
An easy method
Place a clear plastic bag loosely over the pot.
You can use small sticks, skewers, or wire to keep the plastic from resting directly on the leaves.
Alternatively, use a clear propagation dome or transparent container.
But don’t seal it completely without checking it.
The cutting still benefits from some air circulation.
If condensation is excessive, open the cover periodically.
Too much stagnant moisture can encourage rot and fungal problems.
Keep the growing mix:
Moist, but never waterlogged.
Check it regularly.
Don’t assume the cutting needs water simply because you’re worried about it.
Overwatering can be just as damaging as allowing it to dry completely.
7. Keep It in Bright Indirect Light and Wait for Roots
This final step requires patience.
Place the pot somewhere with:
Bright, indirect light.
Avoid intense direct afternoon sun.
A clear plastic cover can create a miniature greenhouse, and direct sunlight can quickly make the temperature inside dangerously high.
A bright windowsill without harsh sun or a protected outdoor spot with filtered light can work well.
How long does rooting take?
Hydrangea cuttings may begin producing roots within a few weeks, although timing varies according to:
- Temperature
- Variety
- Stem maturity
- Humidity
- Light
- Growing medium
Don’t repeatedly pull the cutting out to check.
That can damage the tiny roots you’re waiting for.
Instead, after several weeks, gently tug the stem.
If you feel resistance, roots may be developing.
Even better, watch for healthy new growth.
What to Do Once the Cutting Has Rooted
Once your hydrangea has developed a healthy root system, gradually begin removing the humidity cover.
Don’t take a cutting that has spent weeks in very humid conditions and suddenly expose it to dry air all day.
Transition gradually
Start by opening the bag or dome for longer periods each day.
After several days, remove it completely if the plant remains firm and healthy.
Once the cutting is well rooted, you can move it into a slightly larger pot containing a suitable potting mixture.
Water thoroughly after repotting.
Then allow the young plant to continue developing.
Should You Plant September Cuttings Outside Immediately?
This depends heavily on your climate and how quickly the cutting roots.
In warm climates with a long autumn, a rooted cutting may have time to establish outdoors.
But in areas where freezing weather arrives quickly, planting a tiny newly rooted hydrangea directly into the garden may be risky.
The young root system doesn’t yet have the resilience of a mature shrub.
In colder climates:
It may be safer to keep your young hydrangea in a protected location through its first winter.
The exact method depends on your conditions.
Possible locations include:
- An unheated but protected greenhouse
- A cold frame
- A sheltered frost-protected area
- Another cool location where the plant doesn’t experience severe freezes
Avoid keeping a dormant outdoor shrub in an excessively hot, dark room.
Hydrangeas still follow seasonal growth cycles.
Which Hydrangeas Can You Propagate This Way?
Many commonly grown hydrangeas can be propagated from stem cuttings, including:
- Bigleaf hydrangea
- Panicle hydrangea
- Smooth hydrangea
- Oakleaf hydrangea
Success rates and rooting speed can vary.
Some cultivars may root more easily than others.
But the basic process remains similar.
One important advantage
A cutting is a clone of the parent plant.
So if you have a hydrangea with flowers, growth habit, or other characteristics you love, propagation allows you to create another genetically identical plant.
Seed propagation doesn’t offer that same certainty.
Should the Cutting Have a Flower?
It’s usually better if it doesn’t.
Flower production consumes energy.
When you’re trying to root a cutting, you want the stem directing resources toward survival and root formation rather than maintaining flowers.
If the only suitable stem has a flower head, remove the flower before propagation.
Don’t feel bad about sacrificing one bloom.
You’re potentially turning that stem into an entire new shrub.
Why the Node Matters So Much
If you remember only one thing about taking hydrangea cuttings, remember this:
Find the nodes.
Nodes are the slight joints or swollen areas where leaves attach to the stem.
They contain actively dividing tissues and are important locations for root and shoot development.
When preparing a cutting, you generally want:
- At least one node beneath the growing medium
- Healthy leaves above the medium
- No leaves buried below the surface
This simple arrangement gives the cutting a good structure for rooting.
Watering: The Part That Requires the Most Attention
Most propagation failures come back to moisture.
Too dry?
The cutting wilts before it produces roots.
Too wet?
The stem can rot.
The goal is the middle ground.
Keep the propagation medium consistently damp enough to support the cutting but open and airy enough for oxygen to reach the developing roots.
Check with your finger
Touch the surface.
If it still feels evenly moist, wait.
If it’s beginning to dry, add a small amount of water.
Don’t keep the pot permanently sitting in a saucer of water.
Can You Root Hydrangeas in Water?
Hydrangea stems can sometimes produce roots in water, which makes this method popular online.
It can be fun because you can watch roots develop.
However, roots that develop in water are adapted to a very different environment from roots that develop in soil or propagation mix.
Transitioning water-rooted cuttings to potting medium can sometimes cause stress.
For producing a garden plant, rooting directly in a light propagation mix is often the more straightforward approach.
That said, experimenting with one cutting in water and another in soil can be an interesting comparison.
What Happens Next Spring?
If your September cutting roots successfully and survives winter, spring is when things become much more exciting.
As temperatures rise, dormant buds should begin producing new growth.
Continue caring for the young plant in its container until the root system is strong enough for planting.
Before moving it permanently outdoors, gradually acclimate it to increased sunlight, wind, and changing temperatures.
This process is often called hardening off.
Once established, choose a planting location appropriate for your hydrangea type.
Many hydrangeas perform well with morning sun and some protection from intense afternoon heat, although sunlight preferences vary among species and climates.
Give the new shrub enough space to reach its mature size.
That tiny September cutting could eventually become a large flowering plant.
September may feel like an unusual time to start new plants, but if your hydrangea still has healthy non-flowering stems, it’s worth trying.