Hydrangeas are the undisputed royalty of the summer garden, beloved for their voluminous flower heads and lush, architectural foliage.
However, the spectacular display of mid-summer is won or lost in May. As the ground warms and the days lengthen, hydrangeas exit their dormant state and enter a phase of rapid “bud initiation” and leaf expansion.
In May, the plant’s metabolic demand for water and nutrients reaches its peak.
If you provide the right structural support and chemical balance during this window, you aren’t just helping the plant grow; you are ensuring that the blooms are larger, the stems are sturdier, and the colors are more vibrant.
Here are the 7 essential things to do in May to guarantee a world-class hydrangea display.
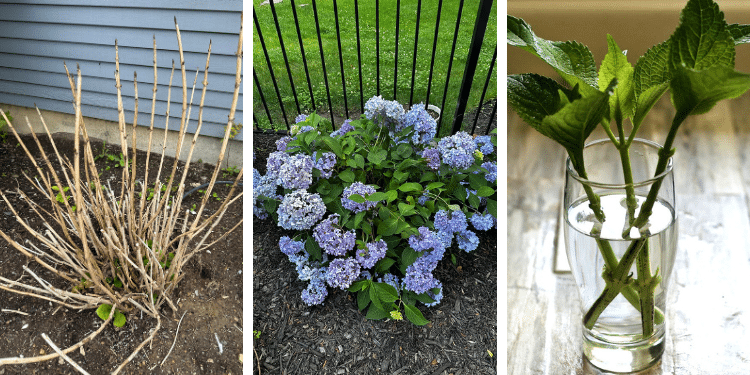
1. Conduct a “Bud Check” and Strategic Clean-Up
Before you reach for the shears, you must understand the “blooming habit” of your specific variety.
Hydrangeas like Hydrangea macrophylla (Bigleaf) and Hydrangea quercifolia (Oakleaf) bloom on “old wood” – stems that grew last year.
-
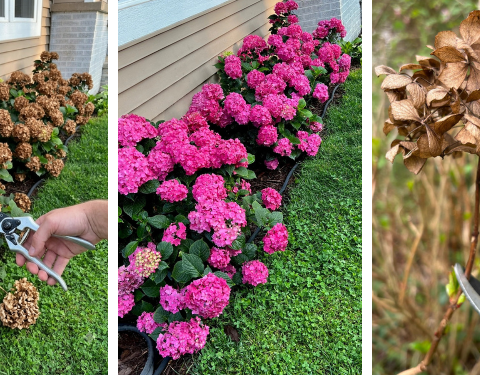
The Action: In early May, look for the fat green buds along the woody stems. If a stem is brittle, grey, and shows no green growth by mid-May, it is likely dead. Snip these dead tips back to the first set of healthy green buds.
-
The Warning: Do not prune the entire bush back to the ground. Doing so in May will remove the “flower blueprints” for the year, leaving you with a lush green bush but zero flowers.
-
The Result: Removing dead weight allows the plant to redirect its energy into the viable buds, leading to larger, more robust flower clusters.
2. Implement the “Deep Hydration” Protocol
Hydrangeas get their name from the Greek word “hydros” (water). Their massive leaves have a high transpiration rate, meaning they lose water rapidly to the air.
-
The Mechanism: For a hydrangea to produce a “basketball-sized” bloom, it must maintain high turgor pressure within its cells. Even a slight afternoon wilt can stunt the eventual size of the flower head.
-
The Action: In May, transition from occasional watering to a deep-soak schedule. Aim for 1 to 2 inches of water per week.
-
The Technique: Always water at the base of the plant. As we’ve discussed with other botanical care, wetting the leaves (especially in the evening) increases the risk of powdery mildew and leaf spot. Use a soaker hose to ensure moisture reaches the deep roots.
3. Apply the “Spring Fuel” (Fertilization)
May is the time to provide the raw materials for growth. However, the type of fertilizer you choose depends on your goal.
-
For Growth: Use a balanced, slow-release fertilizer (like a 10-10-10 NPK). This provides the nitrogen needed for the large, “solar panel” leaves that fuel the plant.
-
For Bloom Size: Look for a “Bloom Booster” with a higher middle number (Phosphorus). Phosphorus is the element responsible for flower development and root strength.
-
The Action: Apply the fertilizer around the “drip line” of the plant (under the outer edges of the leaves) and water it in thoroughly to ensure the nutrients reach the root zone.
4. The “Color Chemistry” Adjustment
If you grow Hydrangea macrophylla, May is your final opportunity to influence the color of your blooms. This is a fascinating example of botanical chemistry involving aluminum ions and soil pH.
-
To Turn Blooms Blue: You need acidic soil (pH 5.2–5.5). In May, apply aluminum sulfate or elemental sulfur to the soil. This makes the aluminum in the soil more “bioavailable” to the plant.
-
To Turn Blooms Pink: You need alkaline soil (pH 6.0–6.2). Apply garden lime (calcium carbonate) around the base of the plant. This “locks” the aluminum away, causing the plant to produce pink pigments.
-
The Rule: This only works on blue/pink varieties. White hydrangeas (like ‘Annabelle’) will stay white regardless of the soil pH.
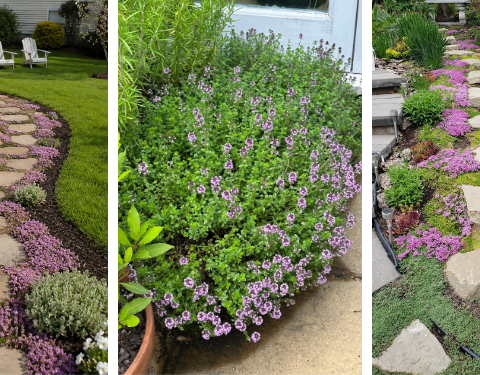
5. Master the “Mulch Shield”
As the May sun intensifies, the soil temperature rises. Hydrangeas prefer “cool feet.”
-
The Mechanism: A thick layer of mulch acts as an insulator, keeping the roots cool and preventing the rapid evaporation of the water you just provided.
-
The Action: Apply a 2 to 3-inch layer of organic mulch (pine bark, compost, or shredded leaves) around the base.
-
The Professional Tip: Leave a 2-inch “breathing gap” between the mulch and the actual woody stems of the hydrangea. Piling mulch against the wood can encourage rot and provide a hiding spot for pests.
6. Structural Support and “Staking”
Many modern hydrangea varieties produce flower heads so large that the stems cannot support the weight, especially after a heavy spring rain.
-
The Action: In May, while the stems are still flexible and only about 1/2 of their final height, install grow-through supports or “hoop” stakes.
-
The Benefit: By placing the supports now, the plant will grow through them, hiding the metal or plastic structure with its foliage. If you wait until the flowers are already drooping in July, it is much harder to stake them without damaging the blooms.
7. Preventive Pest and Disease Scouting
The lush, soft growth produced in May is a magnet for aphids and slugs.
-
The Scout: Check the undersides of the leaves and the tender new tips. If you see “curled” leaves, you likely have aphids.
-
The Remedy: A sharp blast of water from the hose is often enough to dislodge aphids. For slugs, which thrive in the damp mulch of a hydrangea bed, consider using copper tape or organic slug bait.
-
The Result: By stopping pests in May, you ensure that the foliage remains pristine, allowing the plant to focus 100% of its energy on flower production rather than repairing tissue damage.
Taking the time to properly “tune” your hydrangeas in May is the difference between a mediocre garden and a neighborhood showstopper.
By managing the water, chemistry, and structure of the plant now, you set the stage for a summer of massive, head-turning blooms.